
-
Hello Guest, welcome to the initial stages of our new platform!
You can find some additional information about where we are in the process of migrating the board and setting up our new software hereThank you for being a part of our community!
You are using an out of date browser. It may not display this or other websites correctly.
You should upgrade or use an alternative browser.
You should upgrade or use an alternative browser.
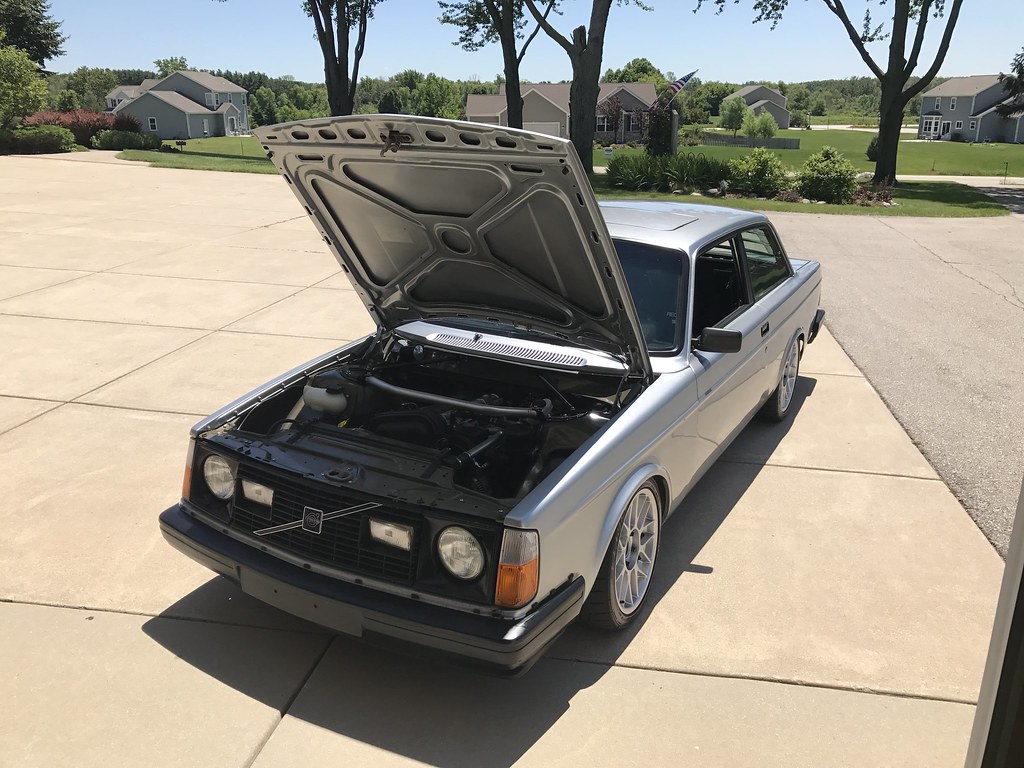
1980 242 GT. A reasonable project.
- Thread starter The Full Banana
- Start date
The Full Banana
not yet good enough
- Joined
- Apr 15, 2007
- Location
- Lake Mills, WI
Nice work Tom! Read about you in the latest Rolling magazine; winning the autocross with a winning build. Further inspiration for my car thanks!
Oh really? If you felt like taking a picture, i wouldn't mind seeing that...
Thanks!

- Joined
- Nov 12, 2002
Looks FANTASTIC! Super clean!
DET17
Reformed SAABaholic
- Joined
- Nov 1, 2009
- Location
- NW Georgia
Can't believe I just now found this thread..... a whiteblock in a 242..... exactly what I am planning (and part gathering) for. Outstanding work, it looks quite clean under hood.
Did you overbore this whiteblock, or is the bore stock with only the H beam rods / cams as the changes?
Did you overbore this whiteblock, or is the bore stock with only the H beam rods / cams as the changes?
The Full Banana
not yet good enough
- Joined
- Apr 15, 2007
- Location
- Lake Mills, WI
This is one of my favorite cars on tb. Any updates?
Thanks! It has been a while since I've updated this. I've been working on some things and fighting a bunch of issues.
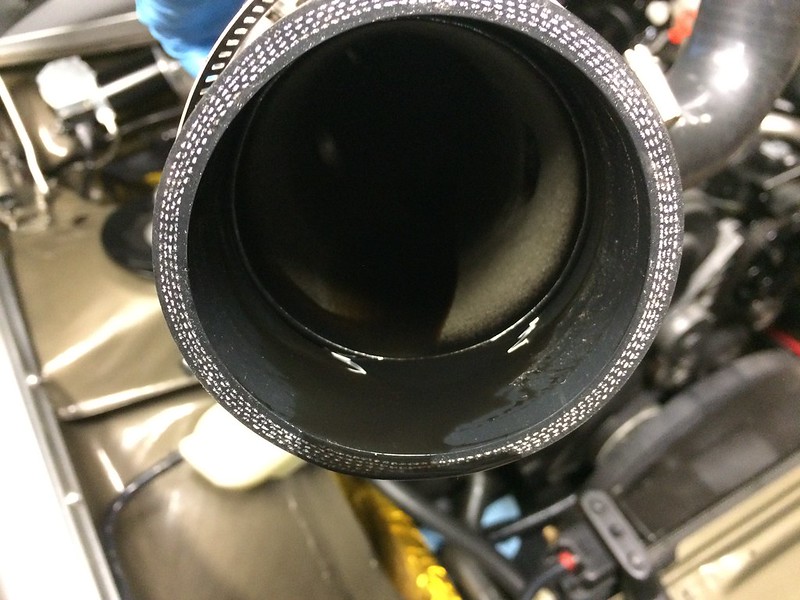
I've had oil consumption issues since putting the whiteblock in the car. A fair amount of this was due to PCV routing mistakes, but after resolving that I decided that I needed to pull things apart to clean out all of the oil... and there was a lot of it.
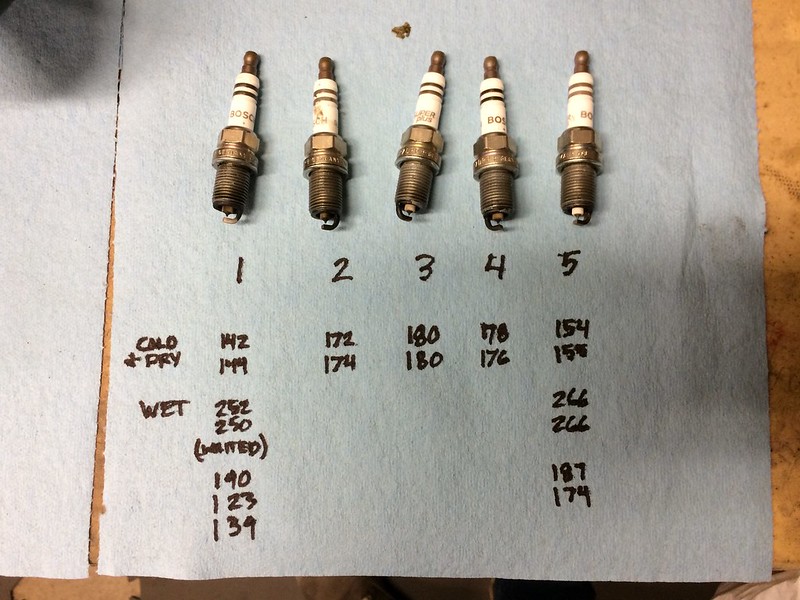
I also checked compression while I was at it. 1 and 5 were a bit low but not to the point that it seemed an immediate next step to pull the head and check things out.
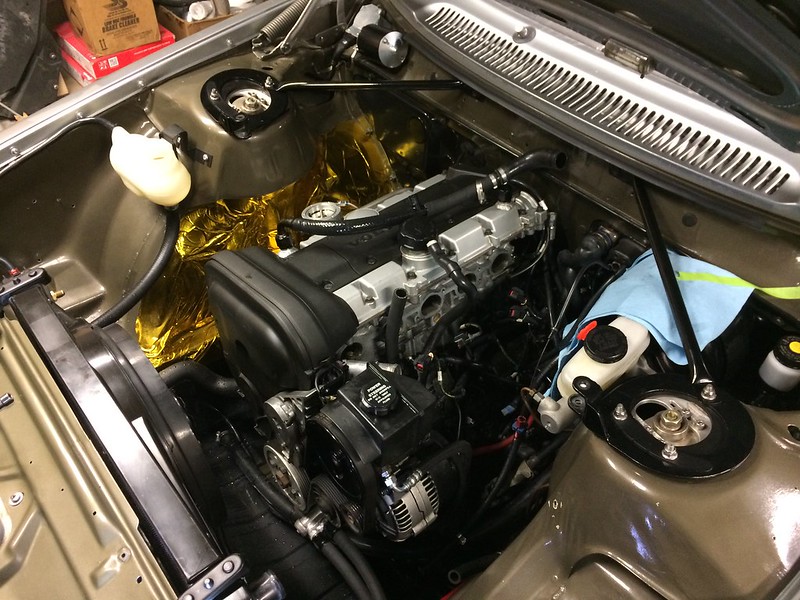
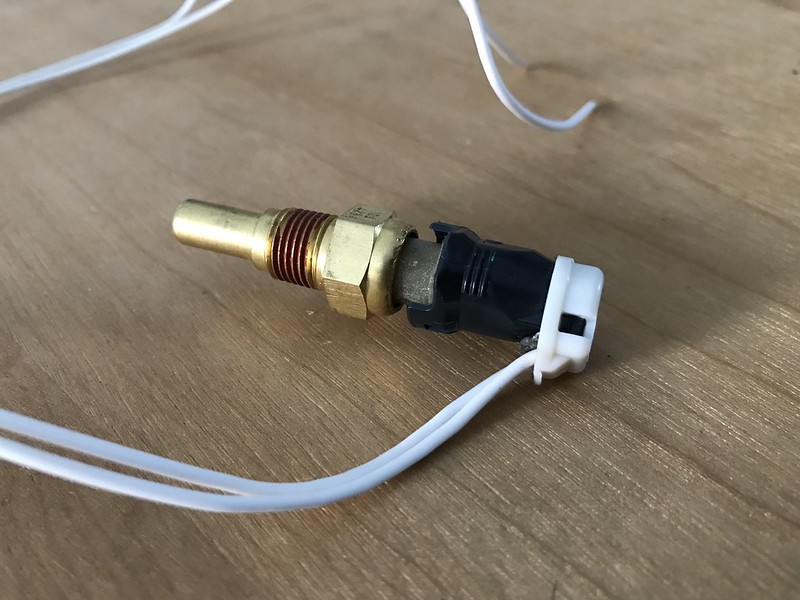
With the engine bay fairly emptied out, I made a few other changes. I swapped in a GM oil temp sender, modifying the wiring harness for the new connector.
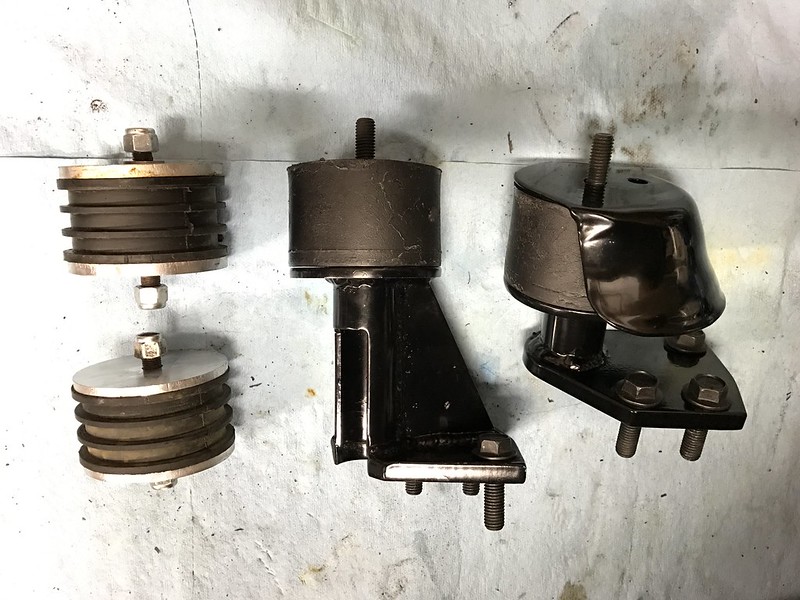
I also put in OE Volvo diesel passenger side engine mounts in place of the Yoshifab HD mounts. There is significantly less vibration from the engine at higher RPM now--very happy with this change.
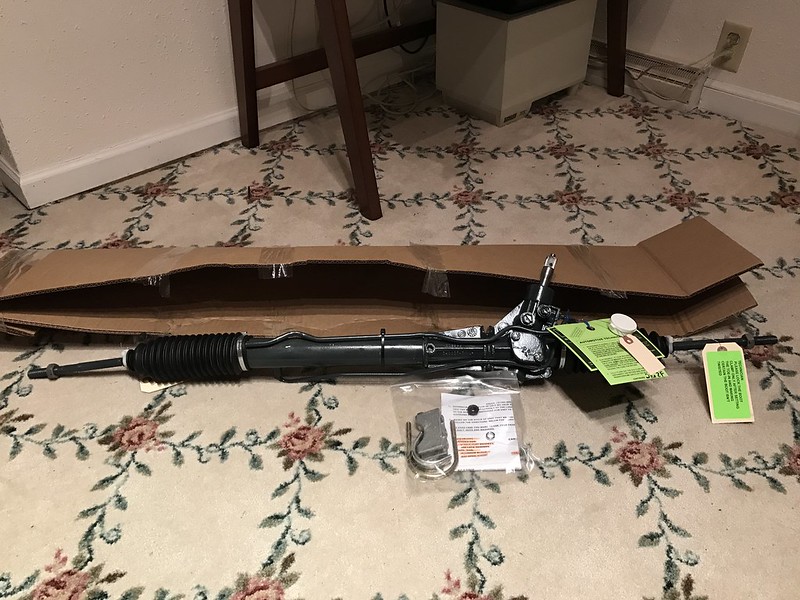
And then purchased a fresh power steering rack from Jorgen auto to swap in place of the unknown CAM rack I had in there.
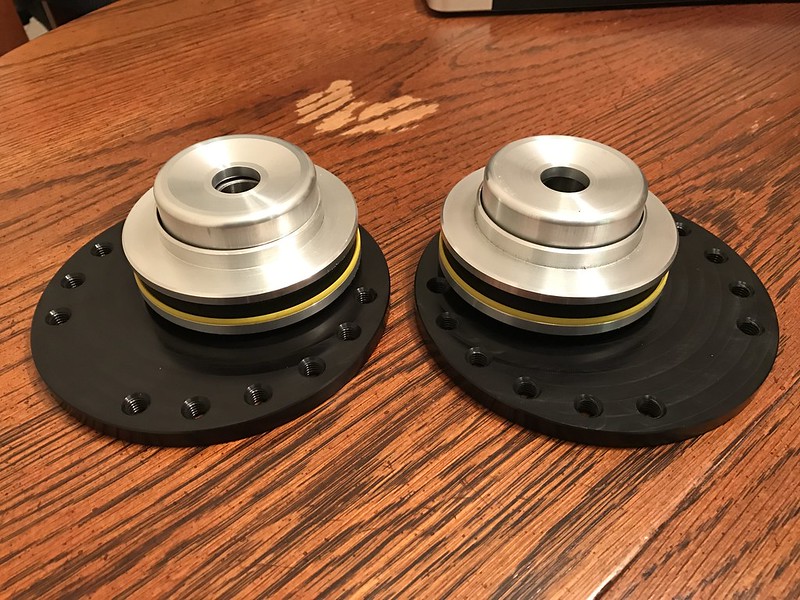
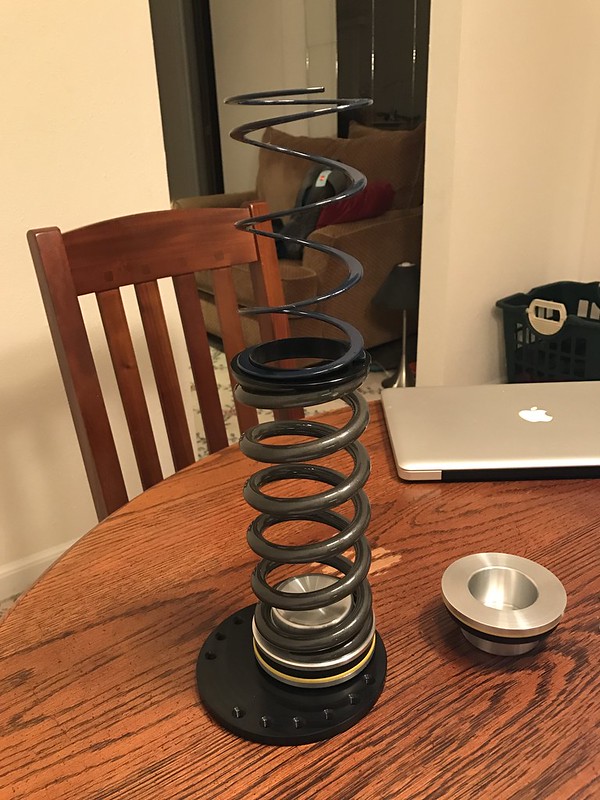
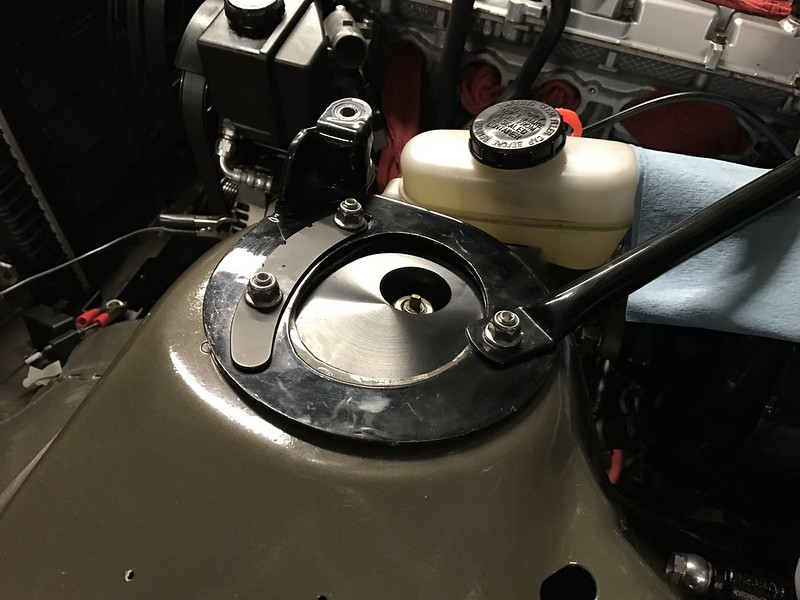
And then some new camber plates, helper springs and main springs.
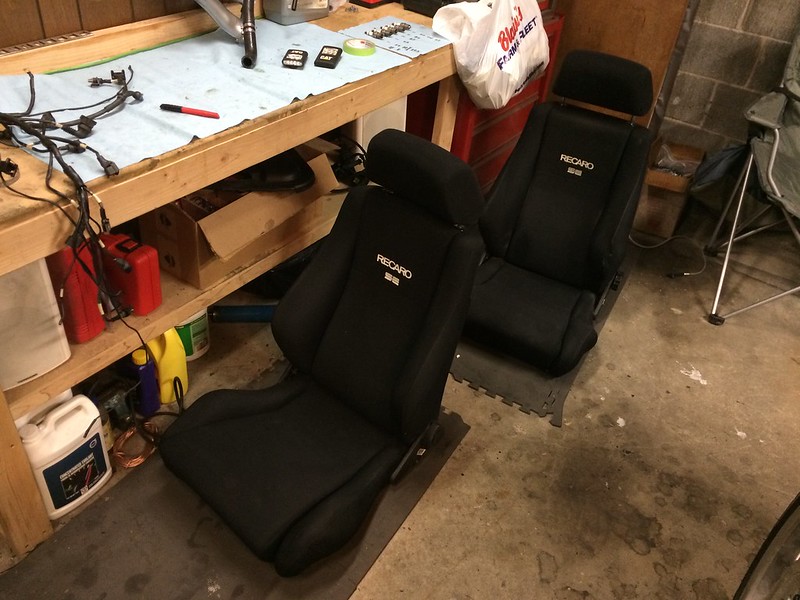
Somewhere along the way I picked up another set of Recaro seats on local craigslist and put those in.

Also installed some of the door linkage reinforcements that quillc made. I would recommend these to anyone with a 242.

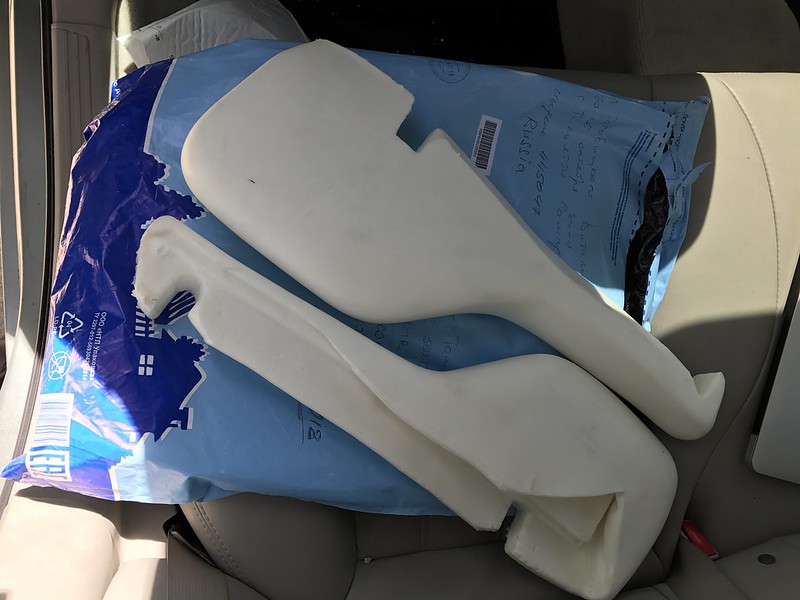
And picked up some lower bolster foam for the other Recaro Trophy's I have
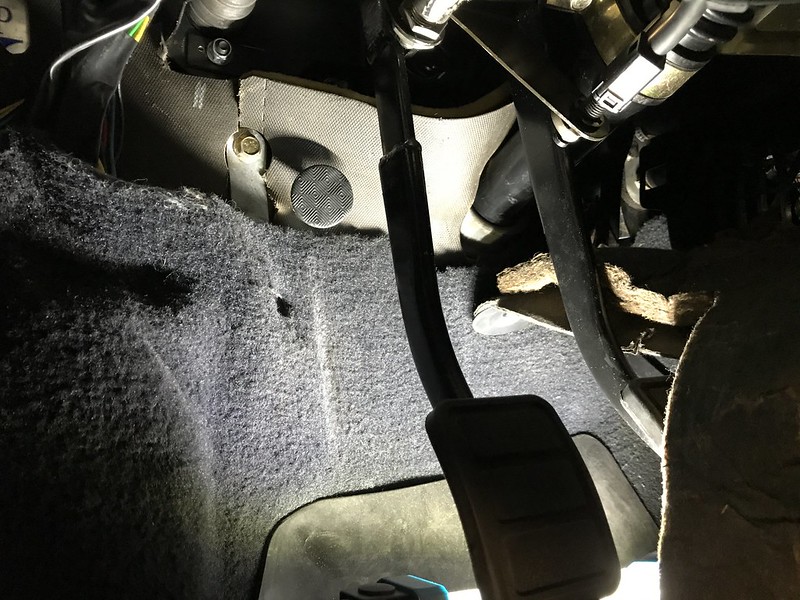
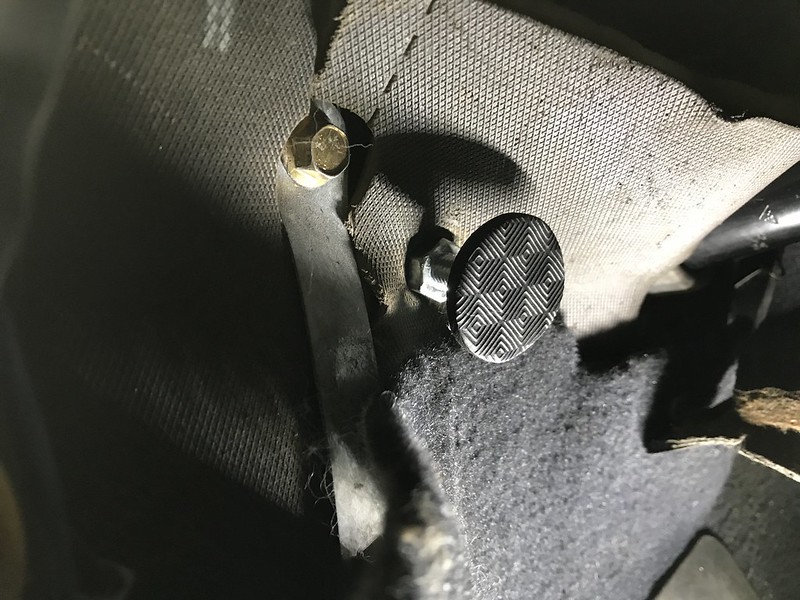
Added a clutch stop by drilling a hole in the firewall, installing a M10 rivet nut and using this aftermarket BMW adjustable clutch stop. The tilton release bearing does not have an internal stop, so this is necessary.
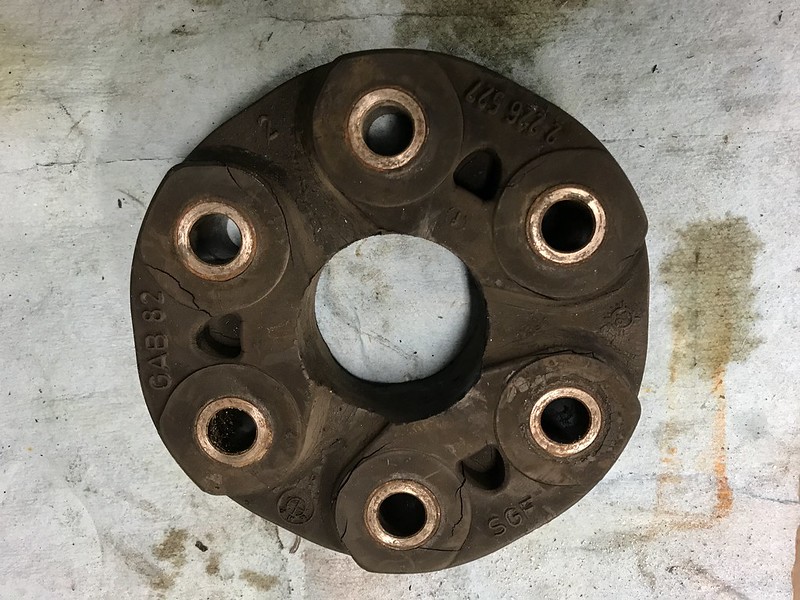
While pulling the transmission to double check on my release bearing setup, I discovered that my old BMW M5 giubo had started developing some cracks, so I replaced that.
Some reproduction louvers arrived from Latvia, followed by some NOS Autoplas mounting hardware and I mounted that up. I wasn't sure if I would like it, but so far I think I do.

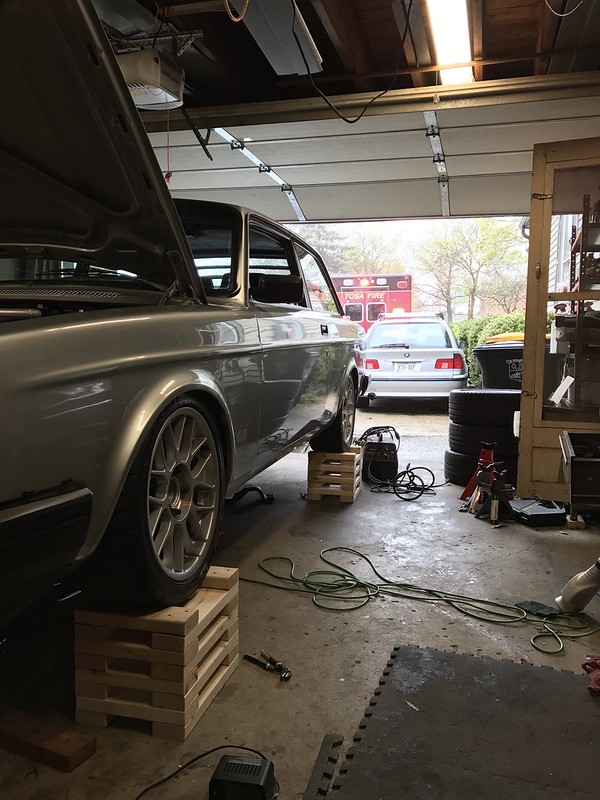
I made some stands out of 2x4 so that I can have the car 11-12" in the air, but with the suspension at ride height. I've been struggling with atrocious driveline vibration, so I'm trying to sort that out now.
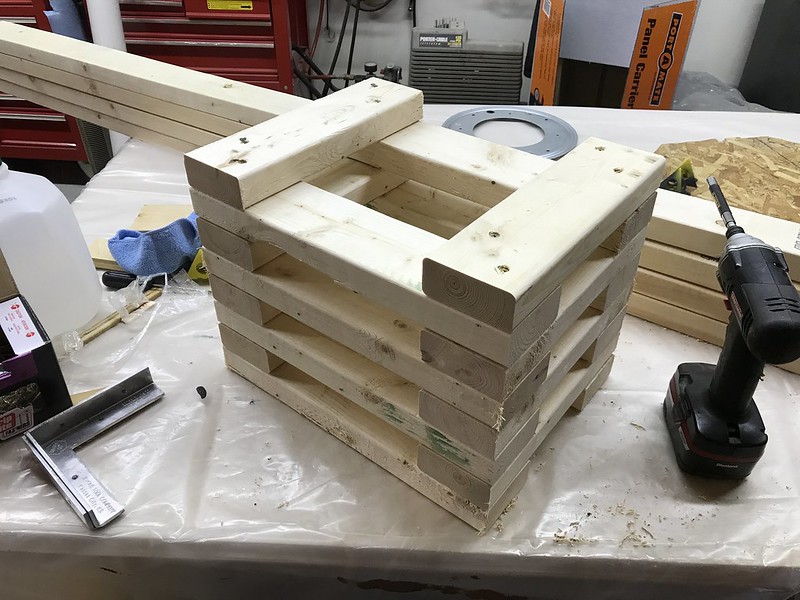
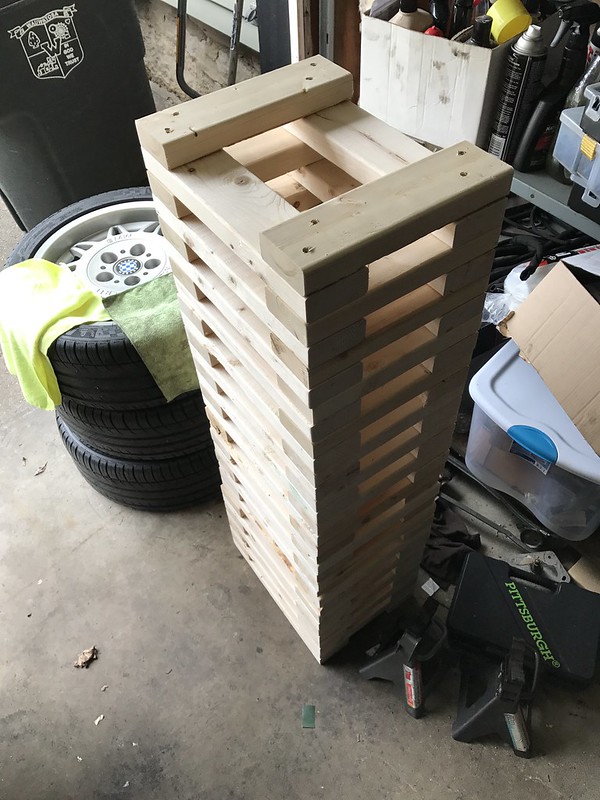
They work like a charm!
So far this year I've taken the car out of the garage once to see what I did and didn't fix yet over the winter. It was nice to see the car out of the garage, even if only for a few hours.
Primary issues still remaining:
- Oil consumption
- Driveline vibrations (35-55mph)
- No steering assist (new PS pump is sitting on the bench)
- Weld new transmission crossmember mount points into the body
- I still haven't gone full throttle.
Last edited:
Stiggy Pop
In the cool kids club
- Joined
- Feb 27, 2011
- Location
- Granville, MA
interested in what specifically re: the PCV routing was causing issues?
")
Primary issues still remaining:
- Oil consumption
- Driveline vibrations (35-55mph)
- No steering assist (new PS pump is sitting on the bench)
- Weld new transmission crossmember mount points into the body
- I still haven't gone full throttle.
- Bumper Trim
The Full Banana
not yet good enough
- Joined
- Apr 15, 2007
- Location
- Lake Mills, WI
interested in what specifically re: the PCV routing was causing issues?
Yeah, bumper trim comments are always warranted. There must be some trick to it, because I've tried twice and it just doesn't want to stay on.
Regarding PCV, I initially had a vacuum draw on the hose between the outlet of the factory separator box and the provent inlet, so it was pulling all kinds of oil into the turbo. After remedying that, I dropped a new unmodified provent filter in (the previous one I had removed the filter element from because I worried it was clogging up). Then, just to be sure that PCV isn't contributing to oil consumption, I blocked off my two added cam cover vents.
- Joined
- May 11, 2007
- Location
- Niketown, OR
Tom, I love you. I love your car.
It needs bumper trim so badly though
It needs bumper trim so badly though
The Full Banana
not yet good enough
- Joined
- Apr 15, 2007
- Location
- Lake Mills, WI
Tom, I love you. I love your car.
It needs bumper trim so badly though

I might have to call in a specialist.
Tuff240
240 Ninja
- Joined
- Jun 27, 2002
- Location
- Central California
Bumper trim tips:
New clips help. If using old clips smash the spring steel back tight to hold better. This should be self explanatory if you look how the clips work, if you don't understand, I can go into further detail, but I doubt you are that dumb.
Put the bumper trim on BEFORE the bumper. After you have the bumper trims in the clips good and everything where you want, then re-install the bumper.
The Full Banana
not yet good enough
- Joined
- Apr 15, 2007
- Location
- Lake Mills, WI
Bumper trim tips:
New clips help. If using old clips smash the spring steel back tight to hold better. This should be self explanatory if you look how the clips work, if you don't understand, I can go into further detail, but I doubt you are that dumb.
Put the bumper trim on BEFORE the bumper. After you have the bumper trims in the clips good and everything where you want, then re-install the bumper.
Thanks for the tips. The clips are all new, although not Genuine Volvo. I will try putting it on with the bumper off of the car.
I needed an excuse to remove the bumper to paint it with SEM bumper coat.
Tuff240
240 Ninja
- Joined
- Jun 27, 2002
- Location
- Central California
Aftermarket ones tend to just fall right out of the body hole. In short, aftermarket body trim clips suck. If that's happening, just buy some genuine Volvo ones.Thanks for the tips. The clips are all new, although not Genuine Volvo. I will try putting it on with the bumper off of the car.
I needed an excuse to remove the bumper to paint it with SEM bumper coat.
The Full Banana
not yet good enough
- Joined
- Apr 15, 2007
- Location
- Lake Mills, WI
Well, on that note, just ordered genuine Volvo clips.
The Full Banana
not yet good enough
- Joined
- Apr 15, 2007
- Location
- Lake Mills, WI
Time for a little update, given that I have the day off.
Alright, on to the picture story thread thing.
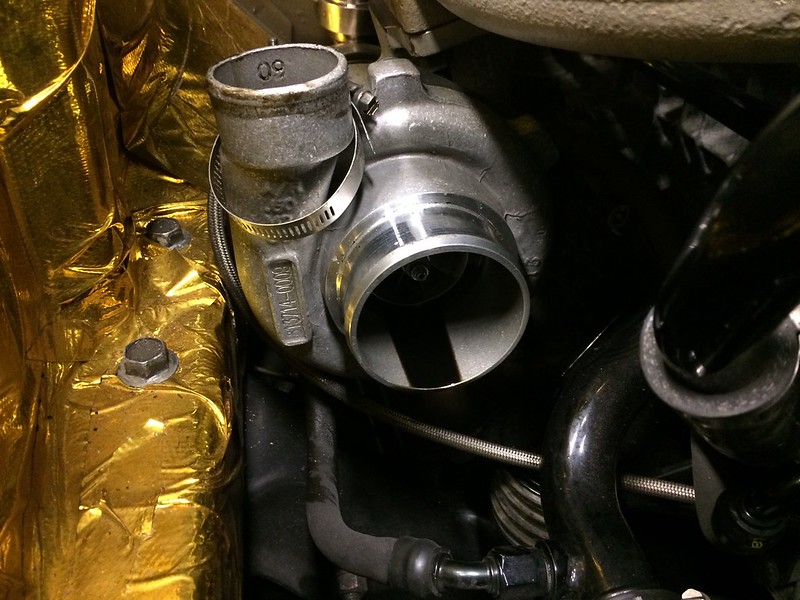
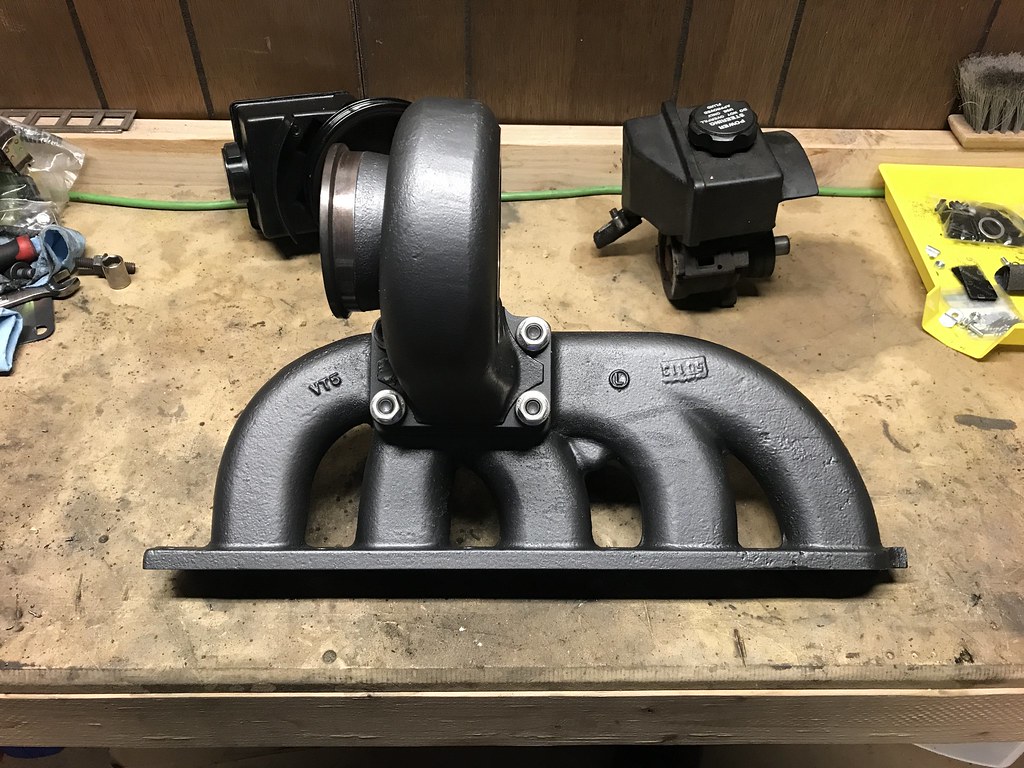
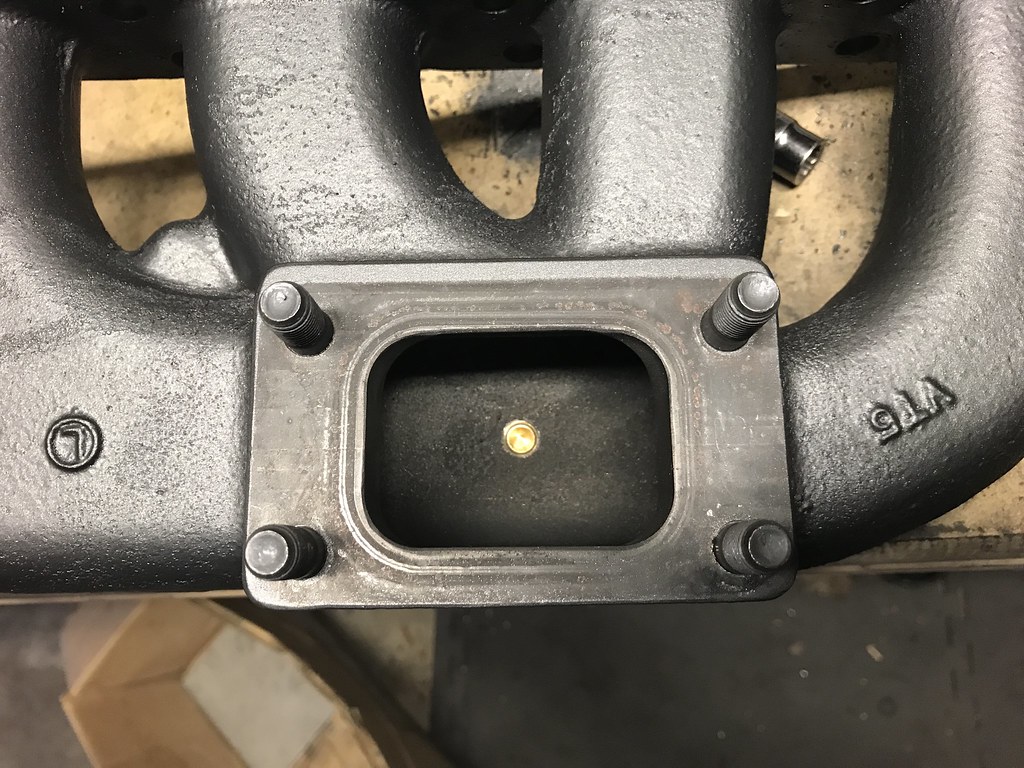
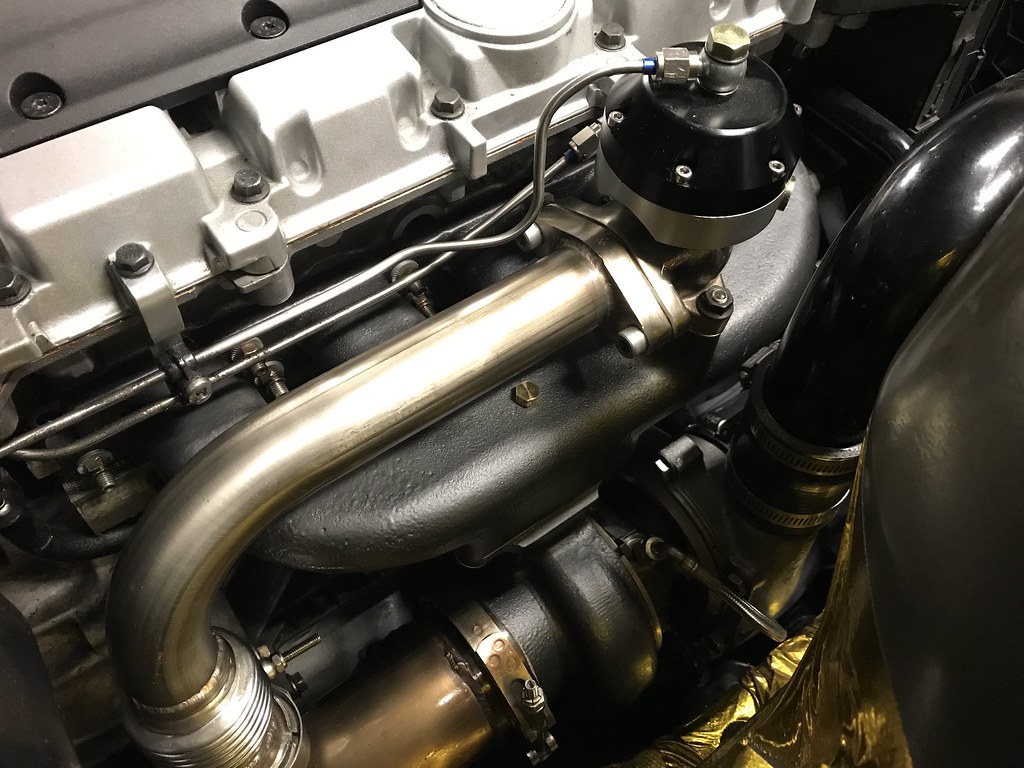
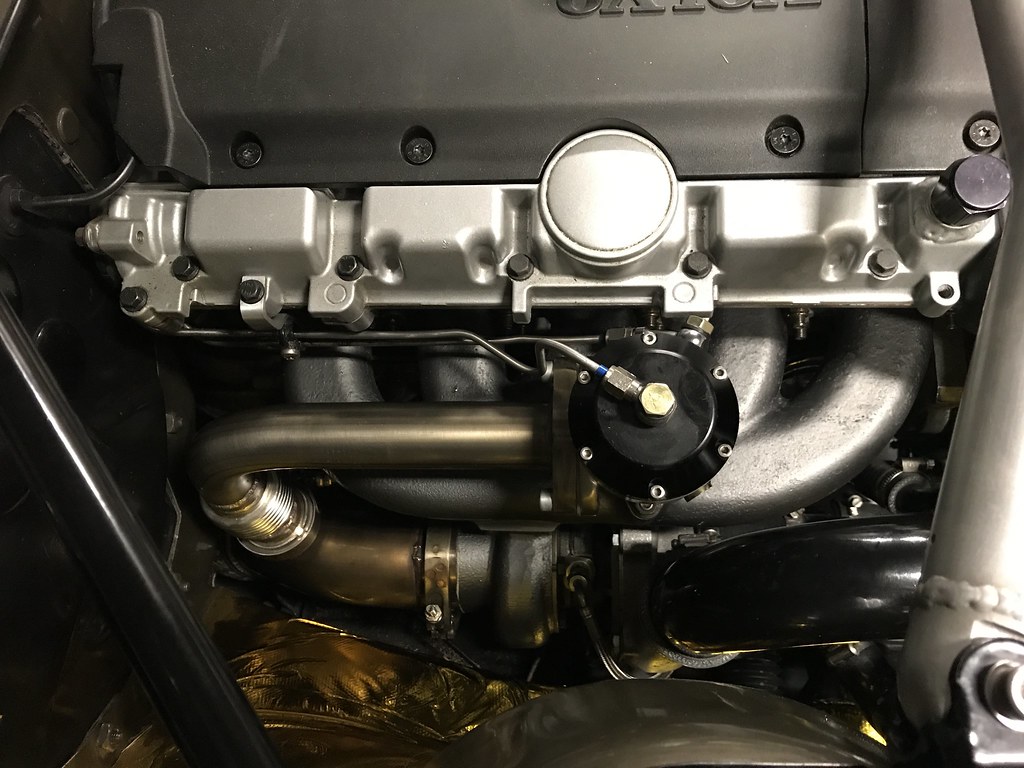
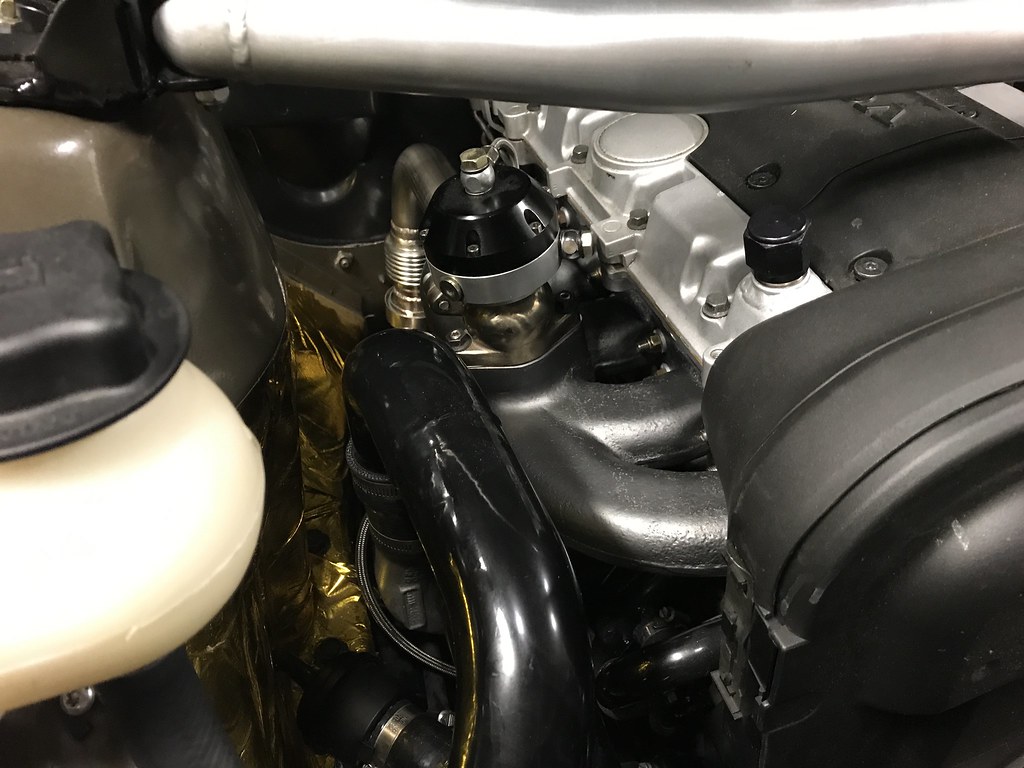
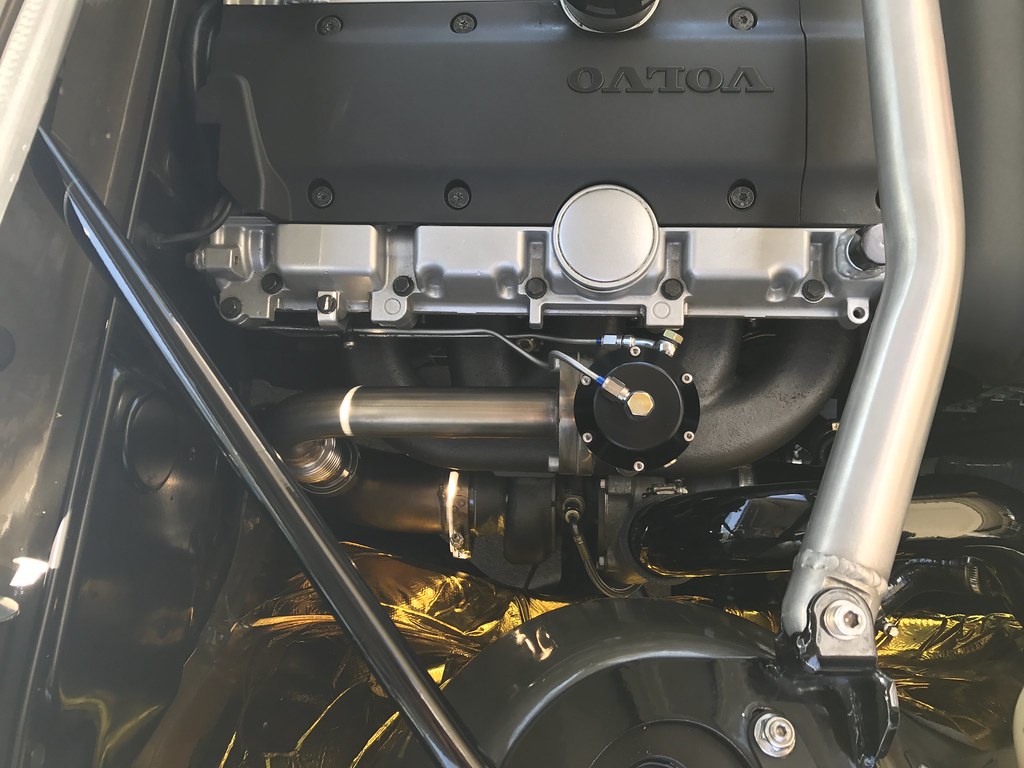
Recently, I removed the turbo to take a closer look at where the oil appeared to be coming from. In the process of that, I sheared off a stud in the exhaust manifold. After that, the manifold had to come out to extract the stud. This happening on a 1 year old stud and copper nut made me decide to explore other hardware options for turbo applications.
I landed on this expensive little bag of hardware for the manifold to turbine housing flange from full-race.com. The studs are M10x1.5 on the manifold side and m10x1.25 on the nut/turbo side with silver plated inconel nuts and nordlock washers. Here's the link: https://www.full-race.com/store/garrett-turbos/full-race-m10-inconel-t3-t4-turbo-hardware-kit/
 IMG_0633 by Tom Elmendorf, on Flickr
 IMG_0634 by Tom Elmendorf, on Flickr
Also went with some more nice Nordlock washers for the rest of the manifold fasteners, MLS manifold gasket, MLS wastegate gasket, and a fresh steel t3 gasket.
 IMG_0635 by Tom Elmendorf, on Flickr
While it was out, I decided to top coat the ugly green ceramic coated manifold and turbo with charcoal Stove Brite, which I previously used on my TD04 with success.
 IMG_0652 by Tom Elmendorf, on Flickr
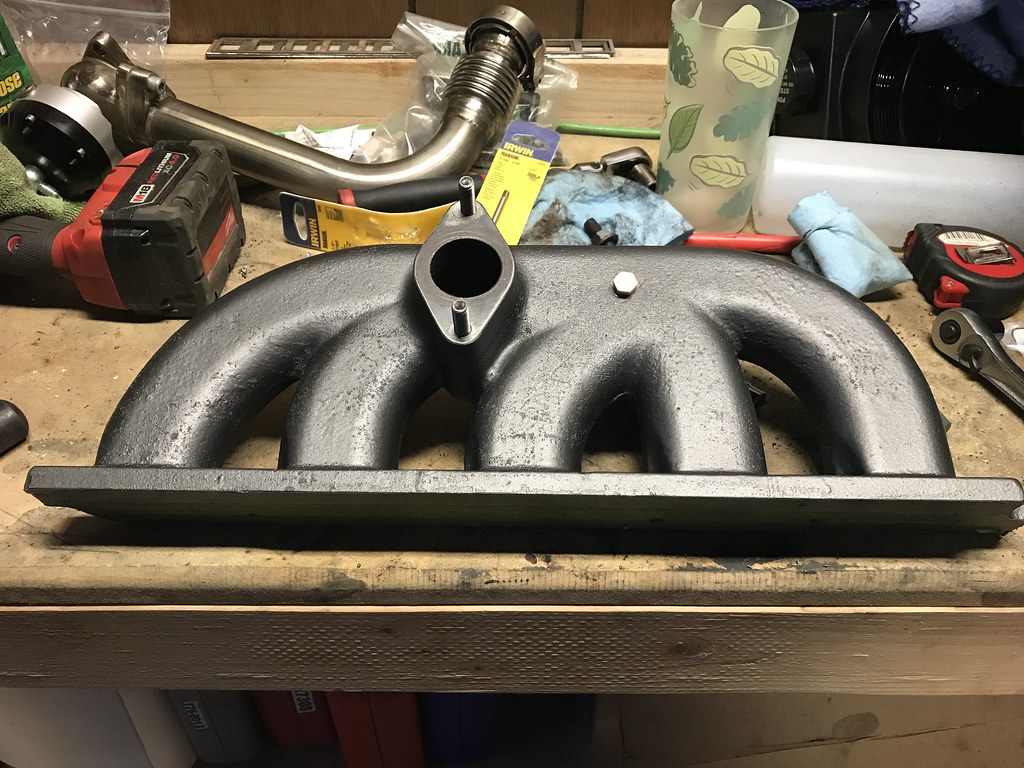
After paint, I drilled and tapped a 1/8NPT hole pointing at the center of the t3 flange to be a future home for an EGT probe.
 IMG_0649 by Tom Elmendorf, on Flickr
 IMG_0648 by Tom Elmendorf, on Flickr
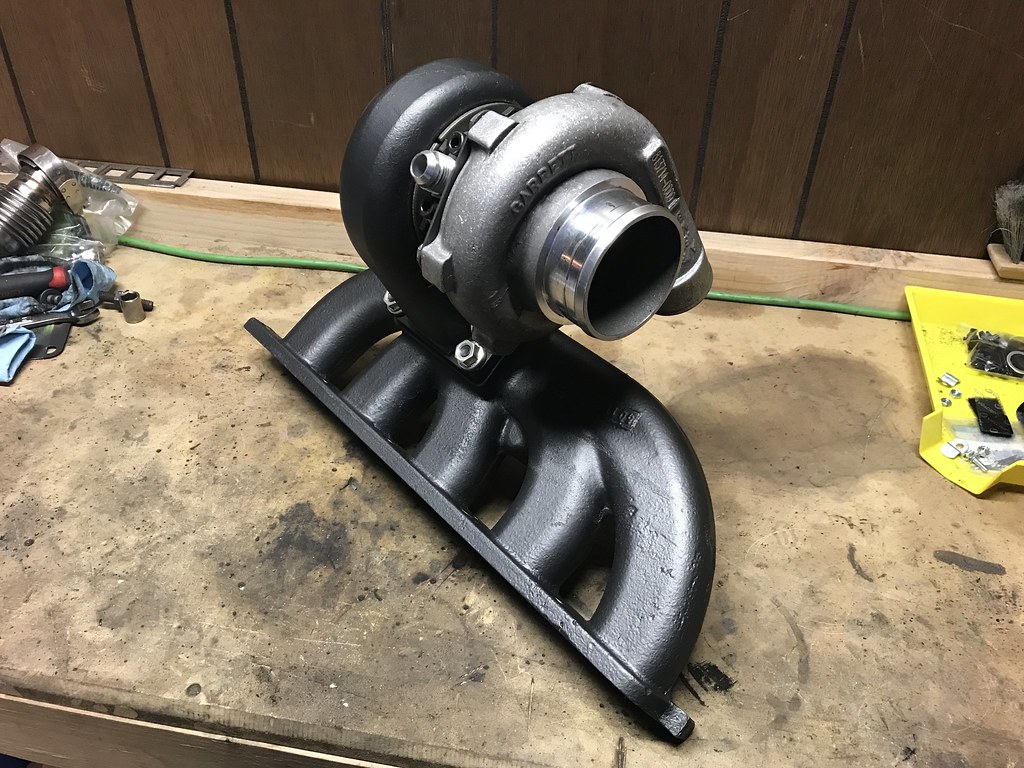
Turbo snugged back in place on the bench for an easy install in the car.
 IMG_0655 by Tom Elmendorf, on Flickr
And everything all buttoned up again. I'm happy with how the manifold looks with this charcoal color compared to the green from before.
 IMG_0666 by Tom Elmendorf, on Flickr
 IMG_0664 by Tom Elmendorf, on Flickr
 IMG_0662 by Tom Elmendorf, on Flickr
With everything back together, I took it for a 2 hour drive. It's still burning a lot of oil. Hopefully I can take some time this weekend to investigate plumbing the oil return to the factory location instead of the 960 pan "wing"
 IMG_0670 by Tom Elmendorf, on Flickr
On a good note, the paint held up well so far for a pretty long spirited drive.
 IMG_0671 by Tom Elmendorf, on Flickr
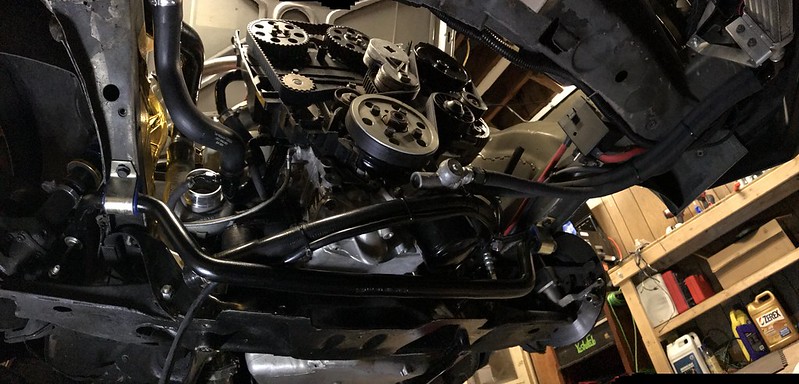
- Driveline vibrations (35-55mph) were solved by flipping the yoke on the rear driveshaft. I must have accidentally flipped it while reinstalling after getting it back from balancing. While I was under there, I welded new transmission crossmember mounting points with reinforcing plates, and reinstalled the proper rubber bushings with steel spacer sleeves.
- Power steering is all good now, after installing a new pump along with a freshly powdercoated pulley. This time I made sure no powder got on the seating surface so that it should be possible to remove, if I ever have the need to.
- Oil consumption still eludes me. At this point I'm led to believe it is a turbo oil return issue. I have ruled out the PCV system, and now believe I've also ruled out excessive oil flow to the turbo as well. I have tried .040", .035" and finally .030" oil restrictors and the issue persists.
Alright, on to the picture story thread thing.
Recently, I removed the turbo to take a closer look at where the oil appeared to be coming from. In the process of that, I sheared off a stud in the exhaust manifold. After that, the manifold had to come out to extract the stud. This happening on a 1 year old stud and copper nut made me decide to explore other hardware options for turbo applications.
I landed on this expensive little bag of hardware for the manifold to turbine housing flange from full-race.com. The studs are M10x1.5 on the manifold side and m10x1.25 on the nut/turbo side with silver plated inconel nuts and nordlock washers. Here's the link: https://www.full-race.com/store/garrett-turbos/full-race-m10-inconel-t3-t4-turbo-hardware-kit/
IMG_0633 by Tom Elmendorf, on FlickrIMG_0634 by Tom Elmendorf, on FlickrAlso went with some more nice Nordlock washers for the rest of the manifold fasteners, MLS manifold gasket, MLS wastegate gasket, and a fresh steel t3 gasket.
IMG_0635 by Tom Elmendorf, on FlickrWhile it was out, I decided to top coat the ugly green ceramic coated manifold and turbo with charcoal Stove Brite, which I previously used on my TD04 with success.
IMG_0652 by Tom Elmendorf, on FlickrAfter paint, I drilled and tapped a 1/8NPT hole pointing at the center of the t3 flange to be a future home for an EGT probe.
IMG_0649 by Tom Elmendorf, on FlickrIMG_0648 by Tom Elmendorf, on FlickrTurbo snugged back in place on the bench for an easy install in the car.
IMG_0655 by Tom Elmendorf, on FlickrAnd everything all buttoned up again. I'm happy with how the manifold looks with this charcoal color compared to the green from before.
IMG_0666 by Tom Elmendorf, on FlickrIMG_0664 by Tom Elmendorf, on FlickrIMG_0662 by Tom Elmendorf, on FlickrWith everything back together, I took it for a 2 hour drive. It's still burning a lot of oil. Hopefully I can take some time this weekend to investigate plumbing the oil return to the factory location instead of the 960 pan "wing"
IMG_0670 by Tom Elmendorf, on FlickrOn a good note, the paint held up well so far for a pretty long spirited drive.
IMG_0671 by Tom Elmendorf, on Flickrt8fanning
8v are still cool, right?
- Joined
- Oct 10, 2010
- Location
- Vancouver, WA
I said it once, I'll say it again. Those wastegate hard lines are beautiful.
Any reason for a single EGT probe instead of one per cylinder?
Any reason for a single EGT probe instead of one per cylinder?
- Joined
- Jul 16, 2009
- Location
- Monterey/Falun
I'm supprised how well that off the shelf manifold fits in the 2xx chassis. Nice work!
Tfrasca
Active member
- Joined
- Apr 20, 2015
- Location
- Ben Lomond, CA
This may be my favorite 240 ever. Well done.