- Joined
- Dec 25, 2002
- Location
- mont, AL
Little play on words there. Anyway, We subjected marvelous's red wagon to use, abuse, smash and upgrade. Much would be learned over the next three days, after he came down to get the 16v treatment that served me so well on the 940. Anticipated issues: intake manifold (because, obvious), charge piping. surely everything else would be normal stuff, right? Wrong. Un-anticipated issues: all of them. Let me re-phrase that: ALL OF THEM.
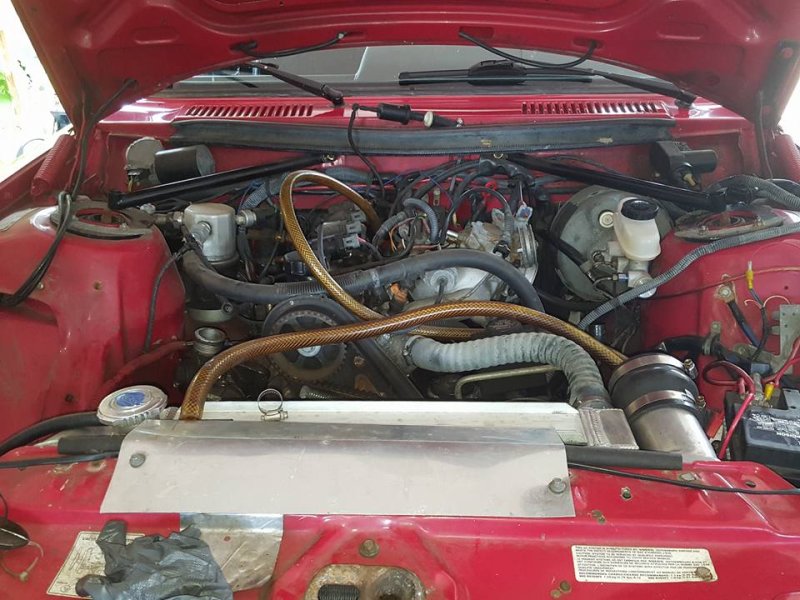
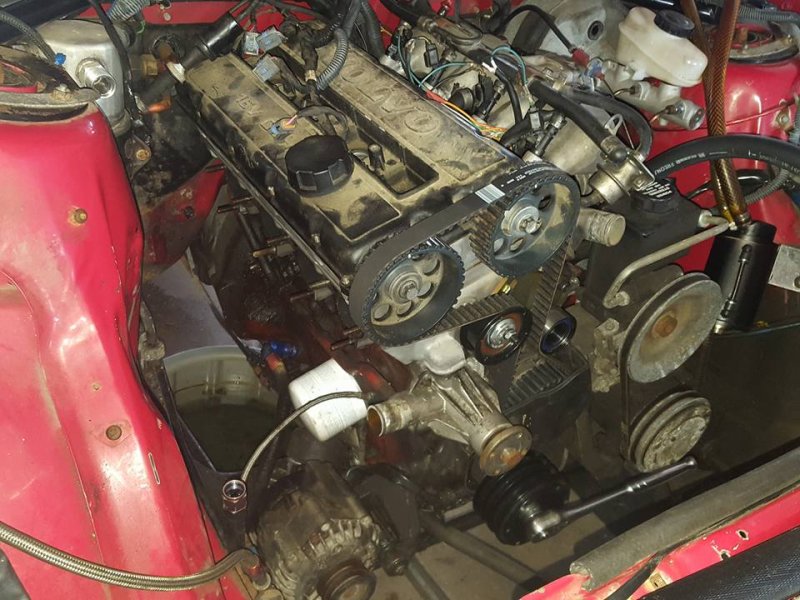
we started here (with breather hoses already disconnected) this was around 1:30 or 2pm friday.
decapitated it (fairly straight forward)
then did battle with the roll pin (replaced with solid dowel). I finally won, after this pic was taken.
I put marv to work cleaning the pink **** off the head while I was doing.. something else. Possibly shortening the intake manifold, or.. there's no telling really

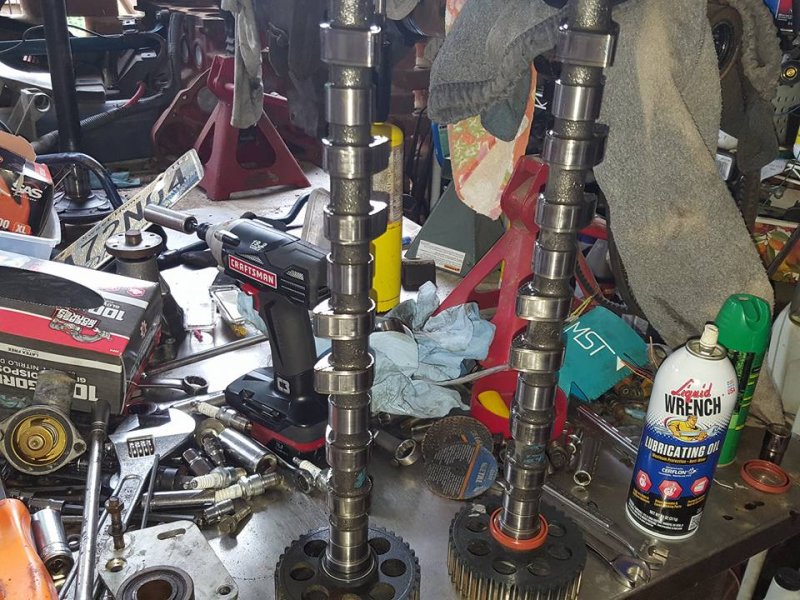
penta cams looking all elegant and ****
nasty welds (had to go through two rounds of shortening)
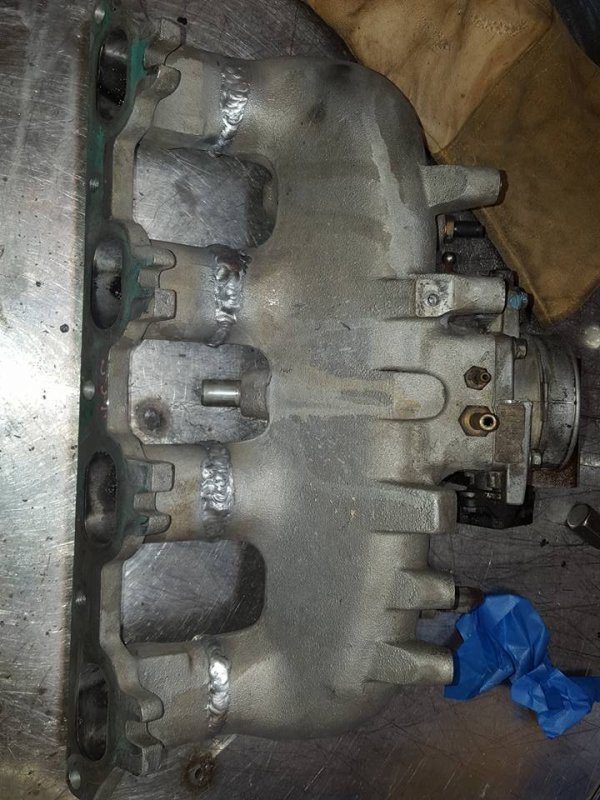
but, not terrible considering I haven't attempted to weld aluminium since before the v8 ran

got that ****er on there and covered it up for the (rest of the)night. 2am stop time on friday.
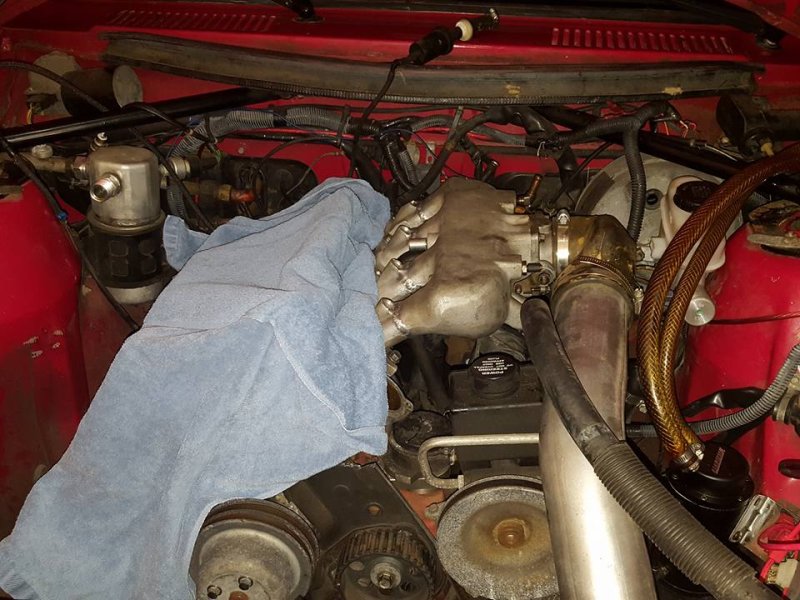
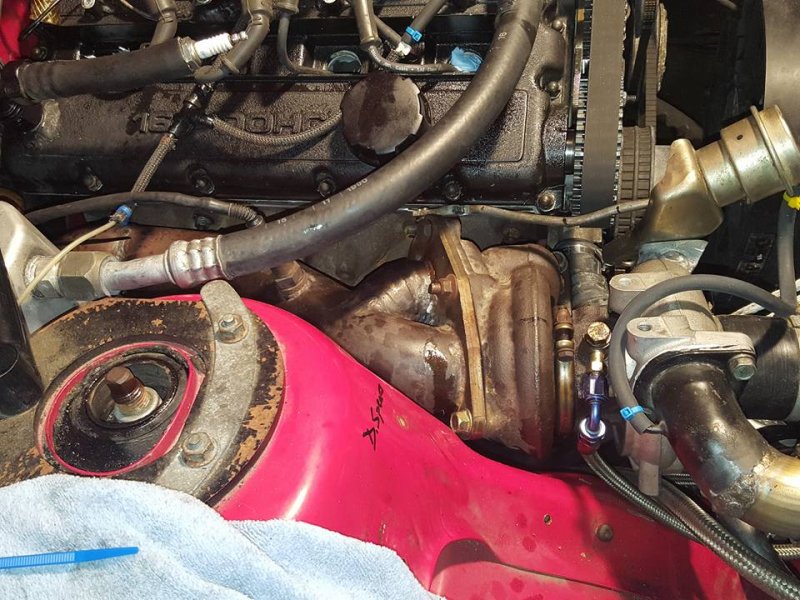
I would be remiss if I did not mention at this point that we started noticing a few things not quite lining up as expected... after getting the intake in place, I wanted to see how the turbo setup was going to come together. Turns out, in spite of putting the turbo reasonably close to the valve cover, it was off in the passenger strut tower on the 240 by.. more than just a small hammer's worth. that was frustrating.
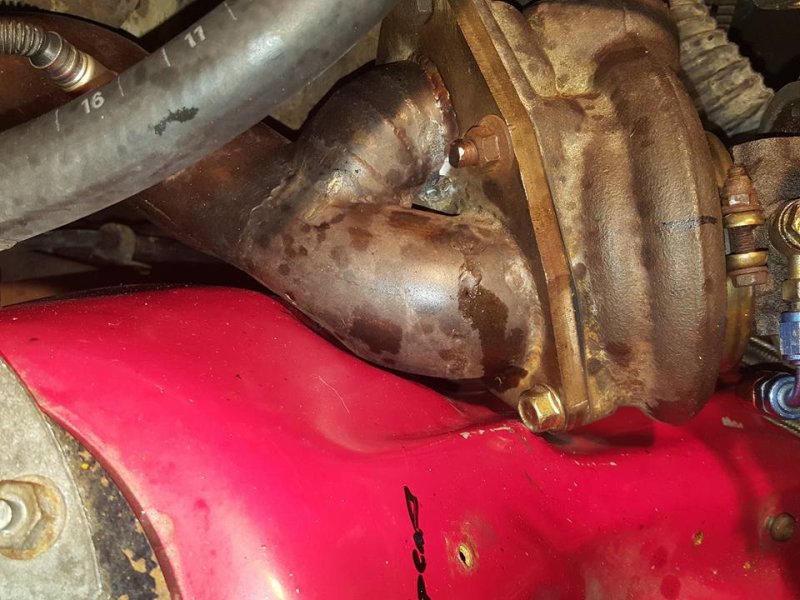
So, first thing saturday, I set about moving the flange over... as far as I could (which was only about an inch, but inches matter more than gold in the suddenly cramped 240 engine bay).
no hammer time yet, but that was coming.
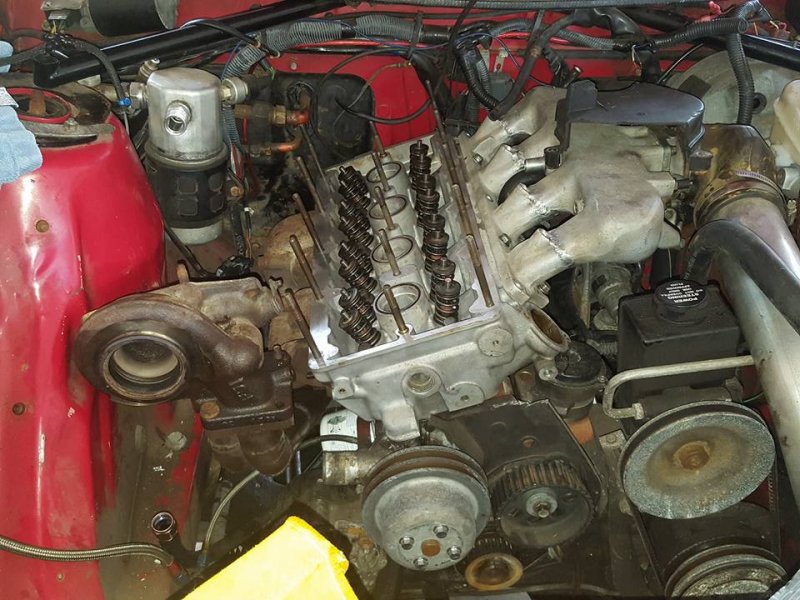
after putting the downpipe on the car, and messing with a few other things, marks were made, and a lot of time was wasted getting the stupid cam box in. As it turns out (lol), on a 200 series with a/c, and with the lip still intact along the firewall, you cannot put the cam box in without taking out numerous studs. All of the studs along the exhaust side had to come out, the rear-most stud along the centerline had to come out, and half of the intake studs had to come out.
that fight was fought and won
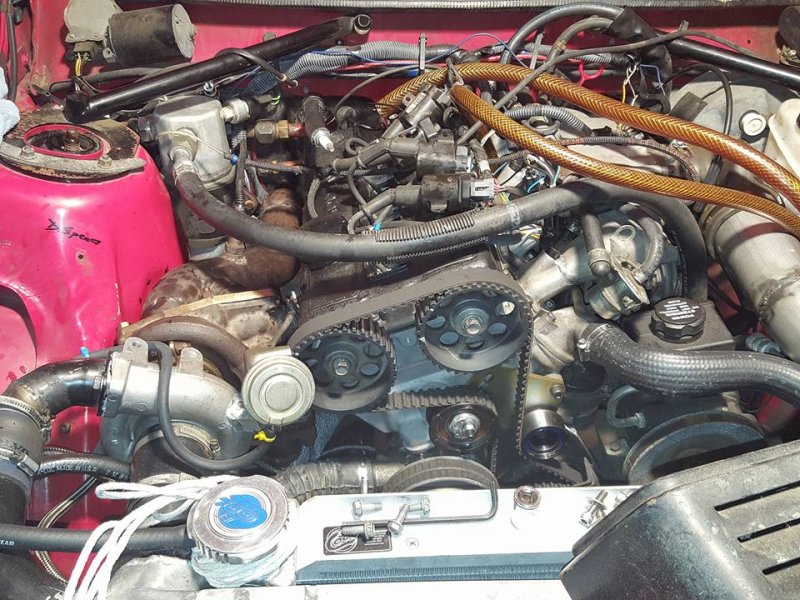
you can see where I marked the hit zone with arrows. I'll have to re-visit that since it's resting up on the strut tower now that everything is installed.
another angle
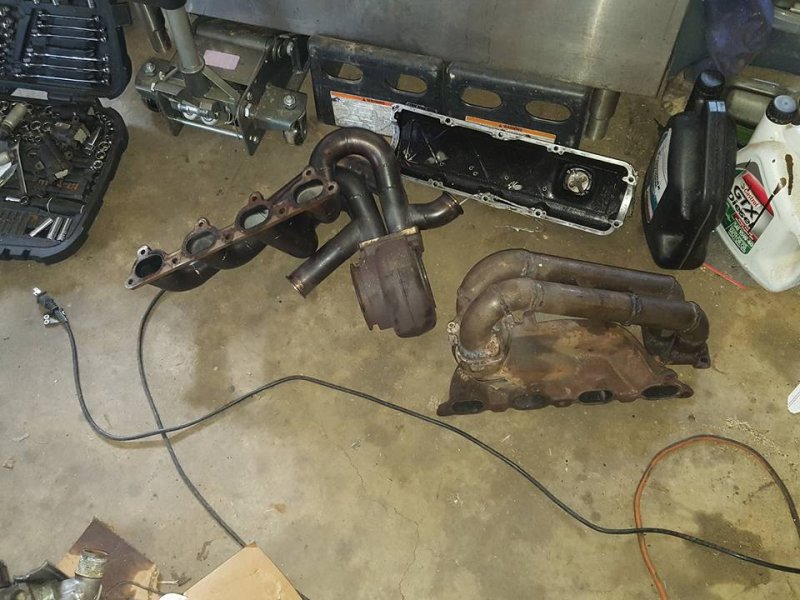
two 16v turbo manifolds
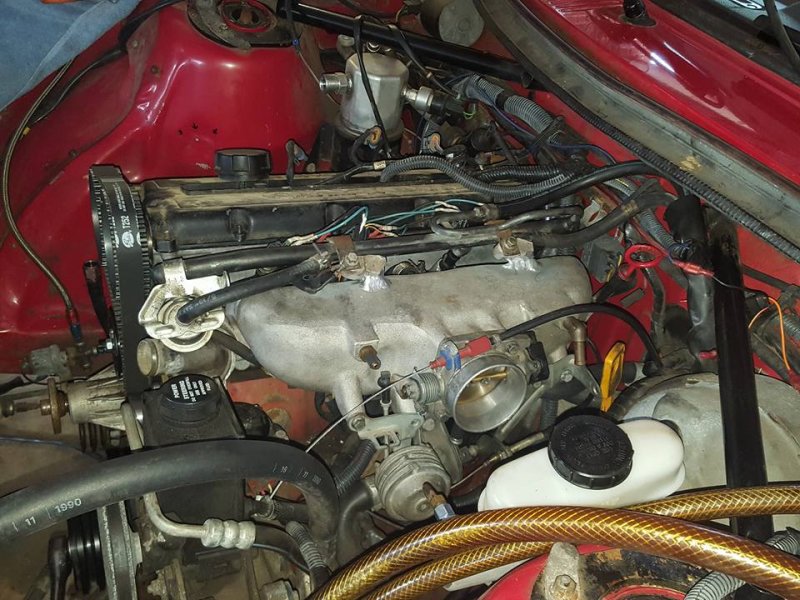
re-use of fuel rail tabs on the intake manifold
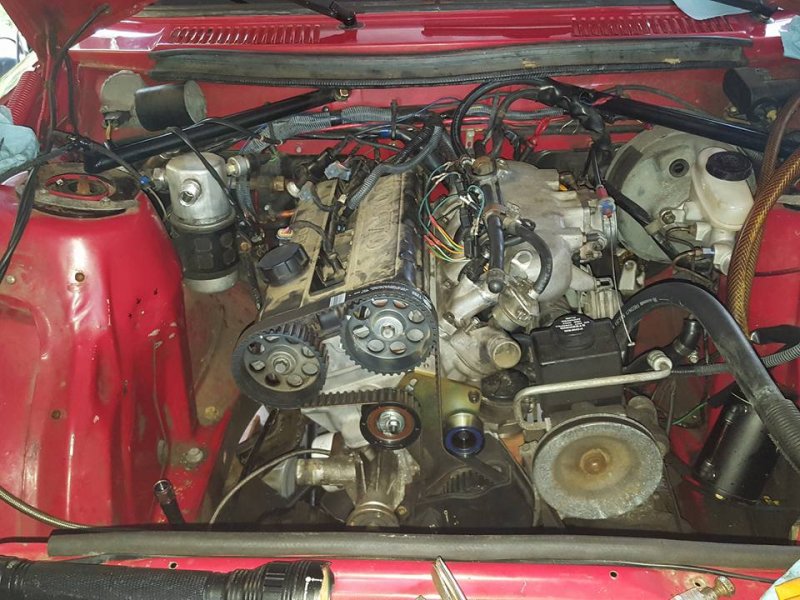
I didn't take any pics sunday, but we finished the mechanical side of things around 12:30pm and attempted (unsuccessfully) to start the car. no big back fires or anything, led me to believe that something was up even though the laptop didn't indicate such, but I'm getting ahead of myself in this yarn.
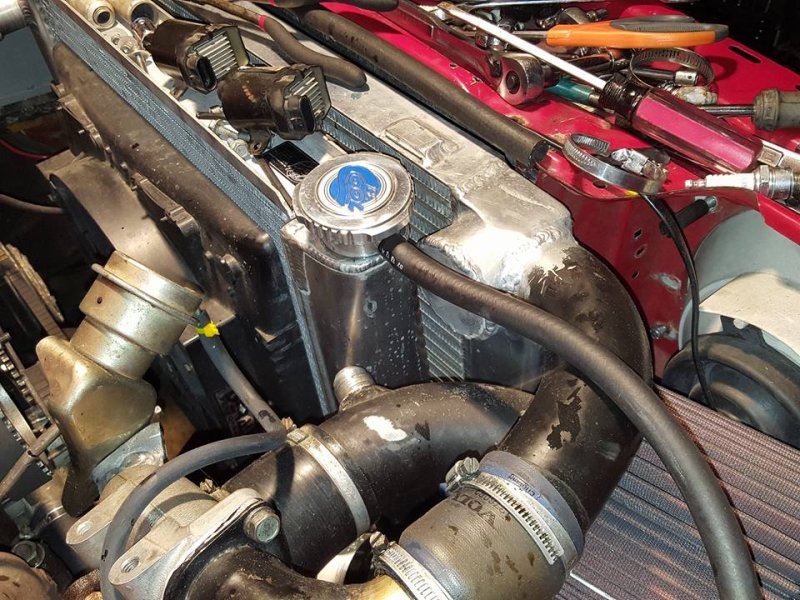
sunday morning I modified the downpipe so it wouldn't interfere with suspension components (that I was perfectly ok adjusting via hammer time). Discovered that there was no reasonable way to connect the compressor outlet with the intercooler inlet as-presented. Ended up cutting the inlet off, welding a plate over it, cutting a hole in the side, and welding a (smaller) inlet pipe on. bonus: it was volvo intercooler piping being welded to it. welded a 45 degree piece to the compressor outlet pipe, probably oughta get a longer coupler for that spot. I'll holler at my guy for that.
butchered the throttle cable and made a 16v cable with the old pieces from the 940 and the baseplate from the 240. winning. Had to adjust the throttle linkage. Losing (but still progressing). Somewhere along the way, we installed the coils from the 940, soldered the injector wiring, hooked all the bull**** up, installed the remote oil filter setup from the 940 (otherwise, you'd have to remove the exhaust manifold to change the oil) put coolant back in the system, topped the oil up (I think. it's going to get changed anyway)
primed the system, discovered that the lines on the filter adapter were backwards, fixed that, primed the system and purged the feed line, put all that stuff together, shortened the kickdown bracket to give a correct adjustment range for the aw71, then the aforementioned no-start situation.
plenty of fuel, no apparent zap (no big cool backfires or anything else). called it a night at 1am. After getting a little irritated, I googled the wiring for the coils that were previously on the car, and the coils that I was using. discovered that they're indexed.. backwards of sorts. swapped the coils, and got the car running finally, briefly. map sensor wasn't plugged in, so it was running WAAAY rich. Eyes burning rich. then the plugs fouled out, and that's where she sits now.
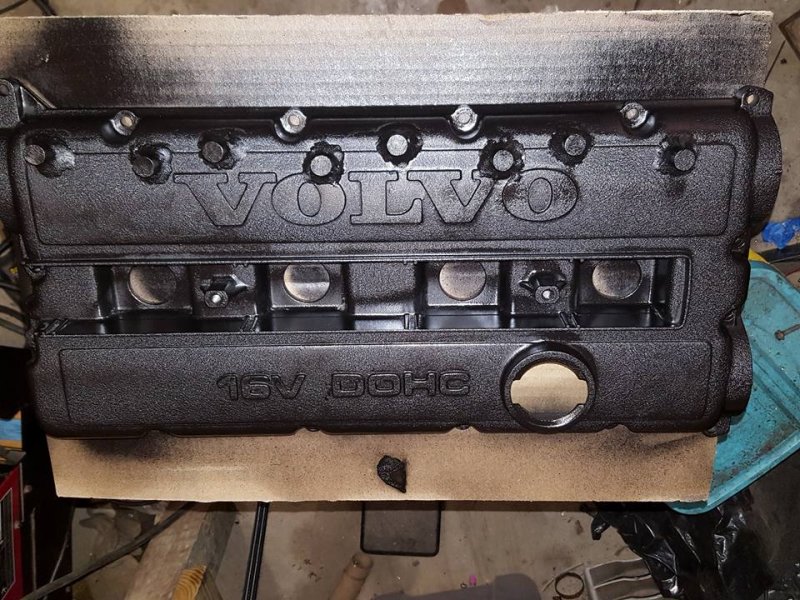
the valve cover got damaged a little on installation, and the posts that I put on there for the coils I was using don't match with the coils on the car, so probably going to do something a little different on the valve cover there, and while I'm doing that, weld the cracked corner back on. Also, the OEM valve cover gasket doesn't come with the plug hole gasket, and the ****ty watery RTV I grabbed seals about as good as... well I'll let your imagination paint that picture.
we started here (with breather hoses already disconnected) this was around 1:30 or 2pm friday.
decapitated it (fairly straight forward)
then did battle with the roll pin (replaced with solid dowel). I finally won, after this pic was taken.
I put marv to work cleaning the pink **** off the head while I was doing.. something else. Possibly shortening the intake manifold, or.. there's no telling really
penta cams looking all elegant and ****
nasty welds (had to go through two rounds of shortening)
but, not terrible considering I haven't attempted to weld aluminium since before the v8 ran
got that ****er on there and covered it up for the (rest of the)night. 2am stop time on friday.
I would be remiss if I did not mention at this point that we started noticing a few things not quite lining up as expected... after getting the intake in place, I wanted to see how the turbo setup was going to come together. Turns out, in spite of putting the turbo reasonably close to the valve cover, it was off in the passenger strut tower on the 240 by.. more than just a small hammer's worth. that was frustrating.
So, first thing saturday, I set about moving the flange over... as far as I could (which was only about an inch, but inches matter more than gold in the suddenly cramped 240 engine bay).
no hammer time yet, but that was coming.
after putting the downpipe on the car, and messing with a few other things, marks were made, and a lot of time was wasted getting the stupid cam box in. As it turns out (lol), on a 200 series with a/c, and with the lip still intact along the firewall, you cannot put the cam box in without taking out numerous studs. All of the studs along the exhaust side had to come out, the rear-most stud along the centerline had to come out, and half of the intake studs had to come out.
that fight was fought and won
you can see where I marked the hit zone with arrows. I'll have to re-visit that since it's resting up on the strut tower now that everything is installed.
another angle
two 16v turbo manifolds
re-use of fuel rail tabs on the intake manifold
I didn't take any pics sunday, but we finished the mechanical side of things around 12:30pm and attempted (unsuccessfully) to start the car. no big back fires or anything, led me to believe that something was up even though the laptop didn't indicate such, but I'm getting ahead of myself in this yarn.
sunday morning I modified the downpipe so it wouldn't interfere with suspension components (that I was perfectly ok adjusting via hammer time). Discovered that there was no reasonable way to connect the compressor outlet with the intercooler inlet as-presented. Ended up cutting the inlet off, welding a plate over it, cutting a hole in the side, and welding a (smaller) inlet pipe on. bonus: it was volvo intercooler piping being welded to it. welded a 45 degree piece to the compressor outlet pipe, probably oughta get a longer coupler for that spot. I'll holler at my guy for that.
butchered the throttle cable and made a 16v cable with the old pieces from the 940 and the baseplate from the 240. winning. Had to adjust the throttle linkage. Losing (but still progressing). Somewhere along the way, we installed the coils from the 940, soldered the injector wiring, hooked all the bull**** up, installed the remote oil filter setup from the 940 (otherwise, you'd have to remove the exhaust manifold to change the oil) put coolant back in the system, topped the oil up (I think. it's going to get changed anyway)
primed the system, discovered that the lines on the filter adapter were backwards, fixed that, primed the system and purged the feed line, put all that stuff together, shortened the kickdown bracket to give a correct adjustment range for the aw71, then the aforementioned no-start situation.
plenty of fuel, no apparent zap (no big cool backfires or anything else). called it a night at 1am. After getting a little irritated, I googled the wiring for the coils that were previously on the car, and the coils that I was using. discovered that they're indexed.. backwards of sorts. swapped the coils, and got the car running finally, briefly. map sensor wasn't plugged in, so it was running WAAAY rich. Eyes burning rich. then the plugs fouled out, and that's where she sits now.
the valve cover got damaged a little on installation, and the posts that I put on there for the coils I was using don't match with the coils on the car, so probably going to do something a little different on the valve cover there, and while I'm doing that, weld the cracked corner back on. Also, the OEM valve cover gasket doesn't come with the plug hole gasket, and the ****ty watery RTV I grabbed seals about as good as... well I'll let your imagination paint that picture.


")