Chapter 18: Radiator, Hoses, Fan and Heater Hoses
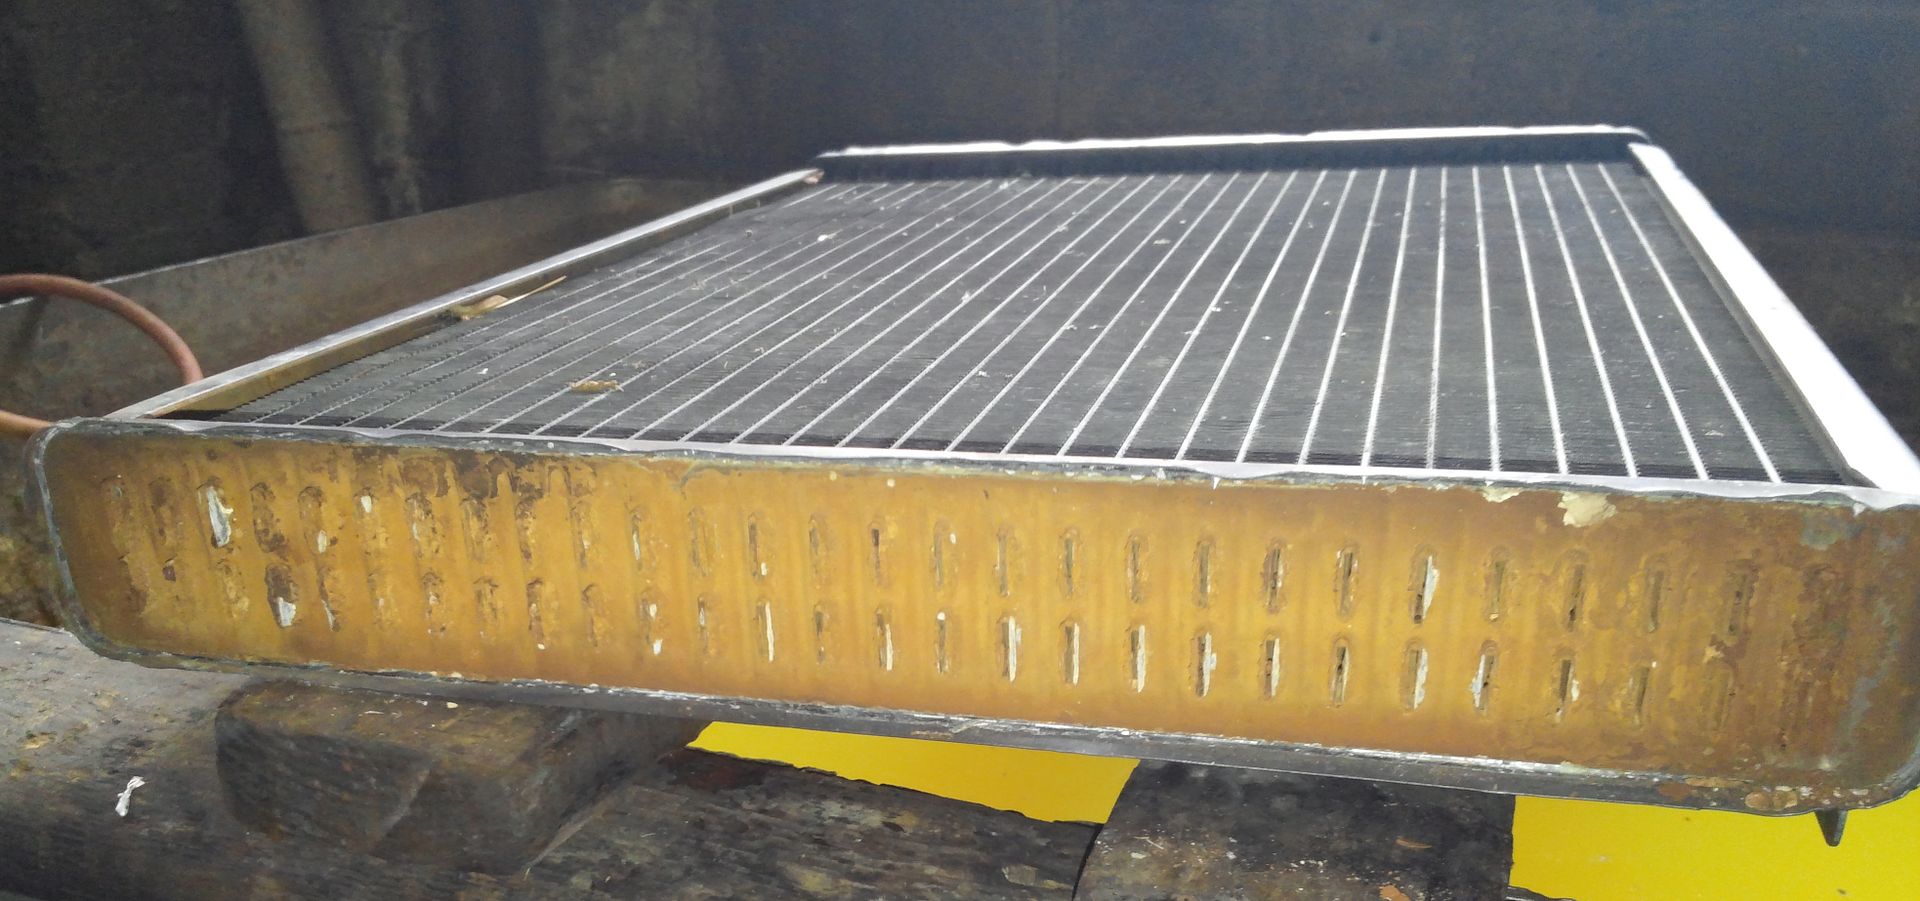
The Diesel radiator is larger than the 4 cylinder version and is reported to be adequate for the V8 cooling in all the discussions, in fact, recommended as the best, low cost solution. With the modifications to the shroud, discussed below, I installed the radiator in its original position with its original support and fastenings. The radiator hose fittings are 1.25” and the Ford water pump input (top) is 1.5”, the bottom is 1.75”. I easily found a formed hose that fit the upper requirements hanging on the rack at the local auto parts store. The lower hose was just about as easy but I had to add an ‘adapter’ to the radiator nipple to convert it from 1.25” to 1.5”. That adapter was simply a two inch piece of the surplus upper hose length. Adapters are made to change sizes in 0.25” increments but I would suggest that one size adjustment might be all that is wise. For this specific application the part numbers are: upper - Advance part number 71133, lower - O’Riley part number 20923
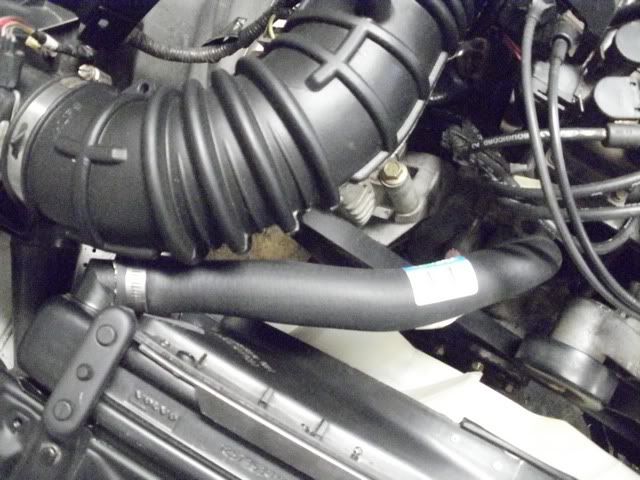
Upper Radiator Hose
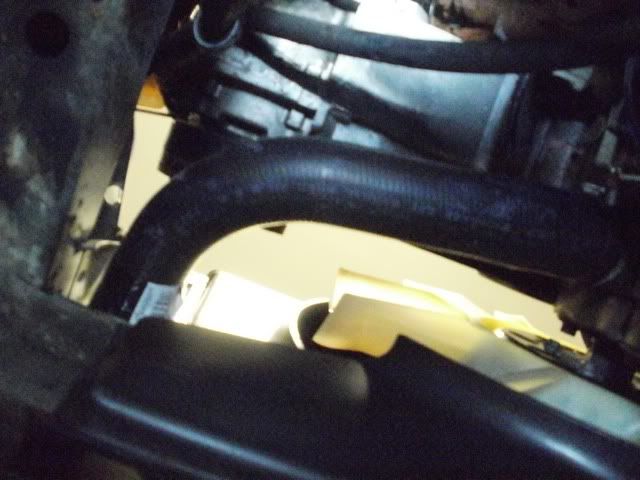
Lower Radiator Hose
Cooling Fan - or - Do as I say, not as I did.
Install an electric fan from a Taurus or order an aftermarket fan from Summit Racing that is the correct width to fit the radiator you are using. You will need to use the fan relay in the Ford Battery Junction Box or an external fan relay.
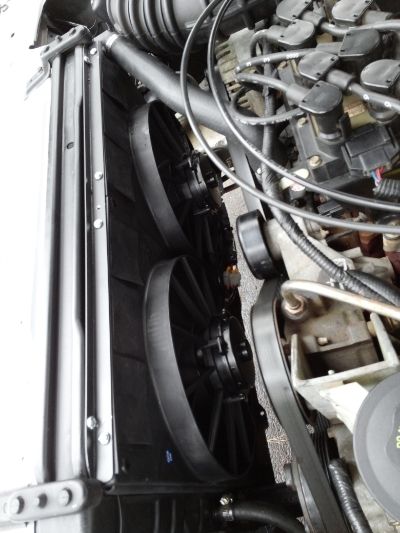
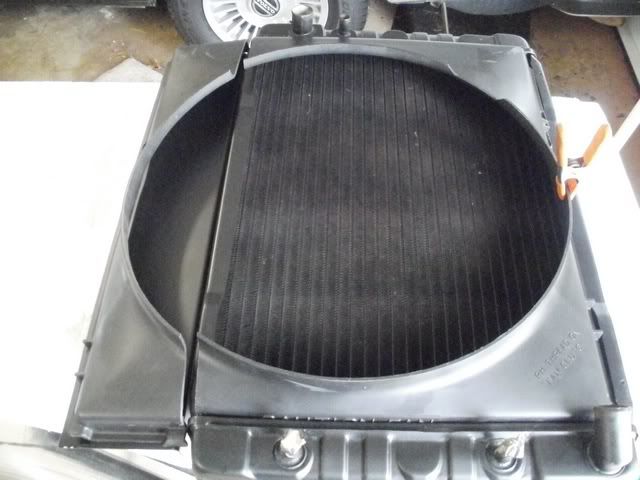
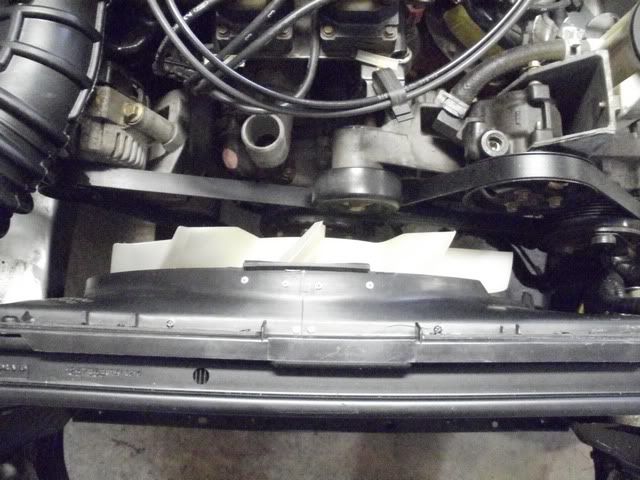
But I didn’t do that since I had ‘everything’ associated with the Explorer engine. There sat a fully functional viscous clutch fan and the Explorer fan shroud. The Explorer accessory mounting brackets and serpentine belt drive provides ample room in front of the engine to use the mechanical fan. This is in contrast to the many earlier Mustang conversions where the front accessory drives make a mechanical fan impossible and an electrical fan a tight fit. On the Explorer engine the issue to resolve is the fan shroud. The Ford shroud is about an inch too wide to fit the Volvo radiator and the front radiator cross member support is about 5 inches too high to allow the lower portion of the shroud to cover the lower 3 inches of the fan. Other than that it is a perfect fit.
Lower Radiator Shroud Modification
Cut Off Piece of Lower Shroud
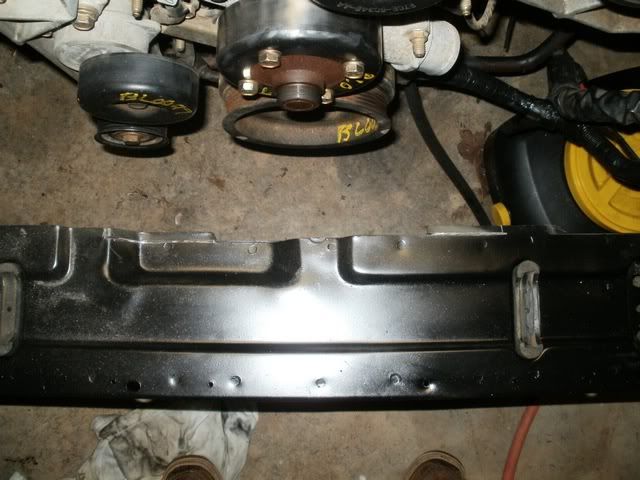
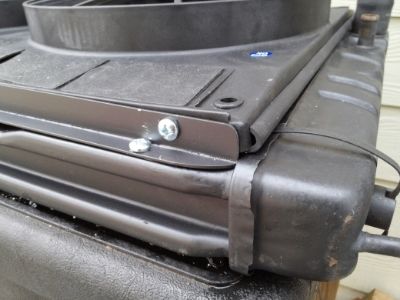
Radiator Cross Member Marked For Cutoff
First, I cut approximately the bottom 5 inches off the Ford shroud. I say ‘approximately’ because that is dependent on your engine mounting position and a half inch is important. Then my personal local trailer manufacturing shop made me a 14 gauge steel bracket ($20) the size of the cut off piece plus an 1” bend across the top for bolting to the radiator cross member. ‘Bolting to the cross member’ turned out to be more difficult than originally envisioned. First, the center section of the cross member was too close to the fan to suite me and I ‘relieved’ it about a quarter inch across the 10” or so that the lower portion of the fan passed by. An air driven cut-off tool got that done in a couple minutes.
Then I realized that the bottom of the cross member was not flat. I made a cardboard pattern of the several non-flat sections of the member and transferred that to the bracket. Grinding, filing, priming, painting and it was done but I had centered the bracket on the fan. (Order the electric fan) The Ford shroud is not centered so I did all the above again moving the bracket to the left to center the shroud on the fan. Now it fit but the remaining top section of the shroud was an inch too wide to fit the radiator. (Order the electric fan).
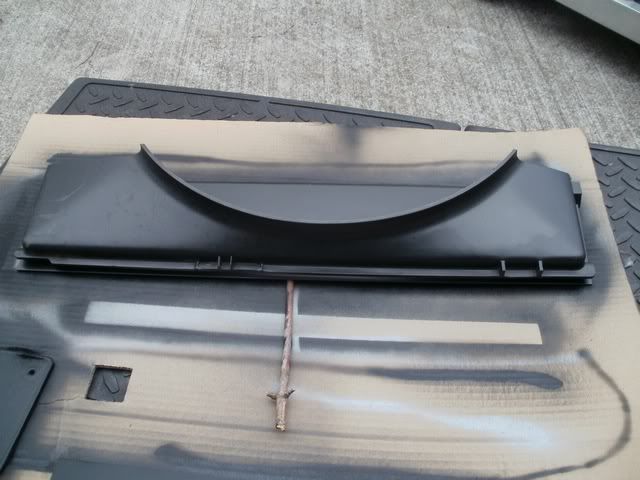
Not to be deterred by the impossible I cut an inch out of the center of the top section of the shroud and glued and pop riveted the pieces back together to match the width of the radiator. Then I cut the top section of the Volvo shroud off and added it to the Ford shroud so the assembly would look and attach the same as the original installation. (Order the electric fan)

Center Inch of the Shroud Removed
Volvo Shroud Top Connection Piece

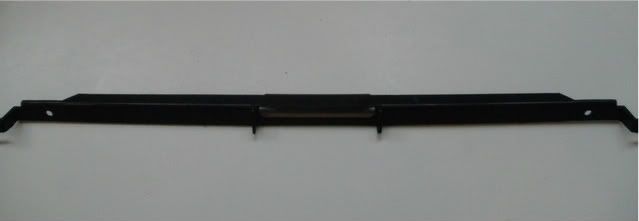
Completed Installation
Getting tired yet? Order the electric fan!
By the way, the plastic used in the fan shrouds contains a lot of silicone making the use of most adhesives a waste of time. I tried ABS cement, construction adhesive, JB Weld, Plastic Epoxy, super strong double backed tape, super glue, and a couple others and nothing would stick to the stuff. Ended up using white, double backed foam tape to hold the pieces together long enough to drill and install aluminum pop rivets.
Do as I say: install the electric fan.
Heater hoses
The heater hoses are very close to the rear of the engine and any cleanup of the firewall connectors is best done before the engine is installed. All the other hose work should be done before the intake manifold is reinstalled just for easy access. I used 90 degree 5/8” preformed elbows found hanging on the hose rack in the back of an Advance Auto Parts store then connected standard heater hose with plastic hose splicers. The engine end uses preformed ‘U’ hoses also found on the hose rack. Both the elbows and the ‘U’ hoses will need to be cut to workable lengths. Nothing difficult, you just need to be a little artistic to get everything to fit.
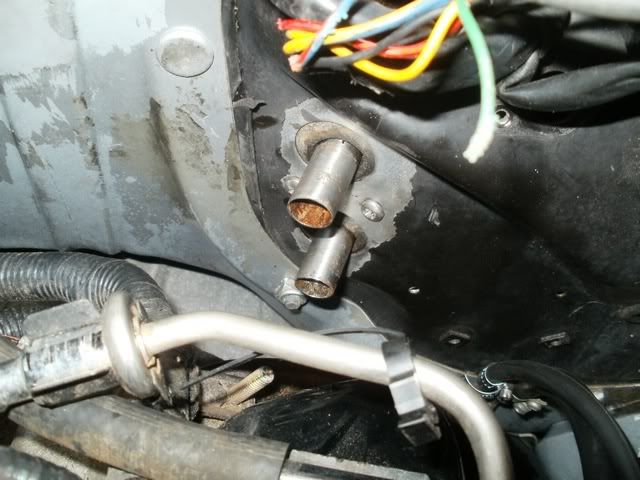
Firewall Heater Hose Connections
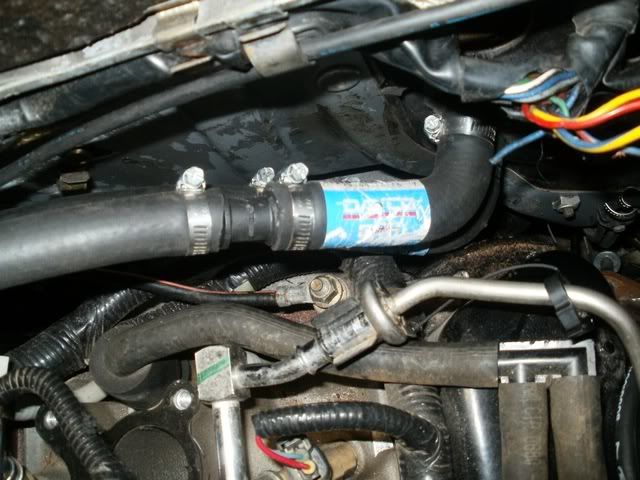
90 Degree Heater Hose and Splices
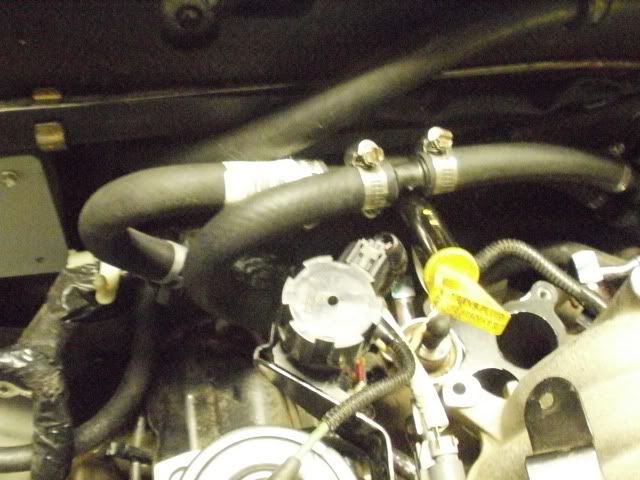
Upper 'U' Connection to Engine
The parent document of this thread can be found here: http://forums.turbobricks.com/showthread.php?t=250257
The Diesel radiator is larger than the 4 cylinder version and is reported to be adequate for the V8 cooling in all the discussions, in fact, recommended as the best, low cost solution. With the modifications to the shroud, discussed below, I installed the radiator in its original position with its original support and fastenings. The radiator hose fittings are 1.25” and the Ford water pump input (top) is 1.5”, the bottom is 1.75”. I easily found a formed hose that fit the upper requirements hanging on the rack at the local auto parts store. The lower hose was just about as easy but I had to add an ‘adapter’ to the radiator nipple to convert it from 1.25” to 1.5”. That adapter was simply a two inch piece of the surplus upper hose length. Adapters are made to change sizes in 0.25” increments but I would suggest that one size adjustment might be all that is wise. For this specific application the part numbers are: upper - Advance part number 71133, lower - O’Riley part number 20923
Upper Radiator Hose
Lower Radiator Hose
Cooling Fan - or - Do as I say, not as I did.
Install an electric fan from a Taurus or order an aftermarket fan from Summit Racing that is the correct width to fit the radiator you are using. You will need to use the fan relay in the Ford Battery Junction Box or an external fan relay.
But I didn’t do that since I had ‘everything’ associated with the Explorer engine. There sat a fully functional viscous clutch fan and the Explorer fan shroud. The Explorer accessory mounting brackets and serpentine belt drive provides ample room in front of the engine to use the mechanical fan. This is in contrast to the many earlier Mustang conversions where the front accessory drives make a mechanical fan impossible and an electrical fan a tight fit. On the Explorer engine the issue to resolve is the fan shroud. The Ford shroud is about an inch too wide to fit the Volvo radiator and the front radiator cross member support is about 5 inches too high to allow the lower portion of the shroud to cover the lower 3 inches of the fan. Other than that it is a perfect fit.
Lower Radiator Shroud Modification
Cut Off Piece of Lower Shroud
Radiator Cross Member Marked For Cutoff
First, I cut approximately the bottom 5 inches off the Ford shroud. I say ‘approximately’ because that is dependent on your engine mounting position and a half inch is important. Then my personal local trailer manufacturing shop made me a 14 gauge steel bracket ($20) the size of the cut off piece plus an 1” bend across the top for bolting to the radiator cross member. ‘Bolting to the cross member’ turned out to be more difficult than originally envisioned. First, the center section of the cross member was too close to the fan to suite me and I ‘relieved’ it about a quarter inch across the 10” or so that the lower portion of the fan passed by. An air driven cut-off tool got that done in a couple minutes.
Then I realized that the bottom of the cross member was not flat. I made a cardboard pattern of the several non-flat sections of the member and transferred that to the bracket. Grinding, filing, priming, painting and it was done but I had centered the bracket on the fan. (Order the electric fan) The Ford shroud is not centered so I did all the above again moving the bracket to the left to center the shroud on the fan. Now it fit but the remaining top section of the shroud was an inch too wide to fit the radiator. (Order the electric fan).
Not to be deterred by the impossible I cut an inch out of the center of the top section of the shroud and glued and pop riveted the pieces back together to match the width of the radiator. Then I cut the top section of the Volvo shroud off and added it to the Ford shroud so the assembly would look and attach the same as the original installation. (Order the electric fan)
Center Inch of the Shroud Removed
Volvo Shroud Top Connection Piece
Completed Installation
Getting tired yet? Order the electric fan!
By the way, the plastic used in the fan shrouds contains a lot of silicone making the use of most adhesives a waste of time. I tried ABS cement, construction adhesive, JB Weld, Plastic Epoxy, super strong double backed tape, super glue, and a couple others and nothing would stick to the stuff. Ended up using white, double backed foam tape to hold the pieces together long enough to drill and install aluminum pop rivets.
Do as I say: install the electric fan.
Heater hoses
The heater hoses are very close to the rear of the engine and any cleanup of the firewall connectors is best done before the engine is installed. All the other hose work should be done before the intake manifold is reinstalled just for easy access. I used 90 degree 5/8” preformed elbows found hanging on the hose rack in the back of an Advance Auto Parts store then connected standard heater hose with plastic hose splicers. The engine end uses preformed ‘U’ hoses also found on the hose rack. Both the elbows and the ‘U’ hoses will need to be cut to workable lengths. Nothing difficult, you just need to be a little artistic to get everything to fit.
Firewall Heater Hose Connections
90 Degree Heater Hose and Splices
Upper 'U' Connection to Engine
The parent document of this thread can be found here: http://forums.turbobricks.com/showthread.php?t=250257
Last edited: