sksmith
Active member
- Joined
- Nov 14, 2007
- Location
- Back in St. Louis, MO
Heh, he meant WWW.GCP.SE
Dyslexia......
Hello Guest, welcome to the initial stages of our new platform!
You can find some additional information about where we are in the process of migrating the board and setting up our new software here
Thank you for being a part of our community!
Heh, he meant WWW.GCP.SE
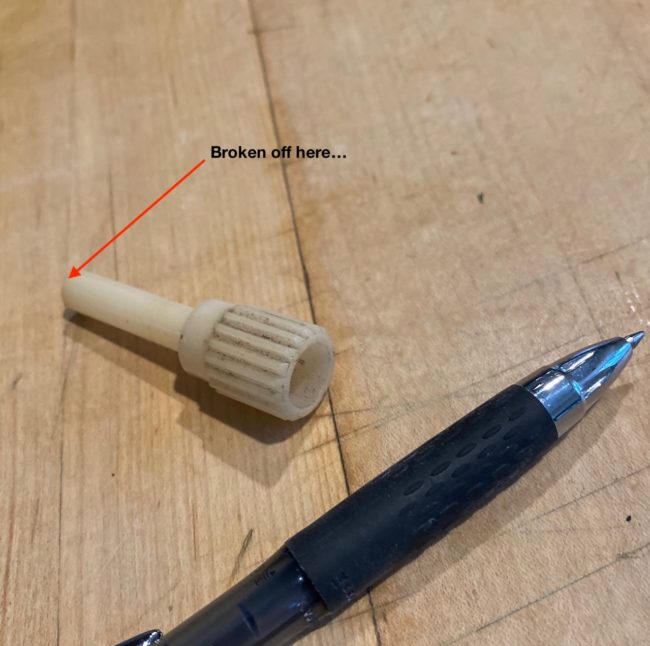
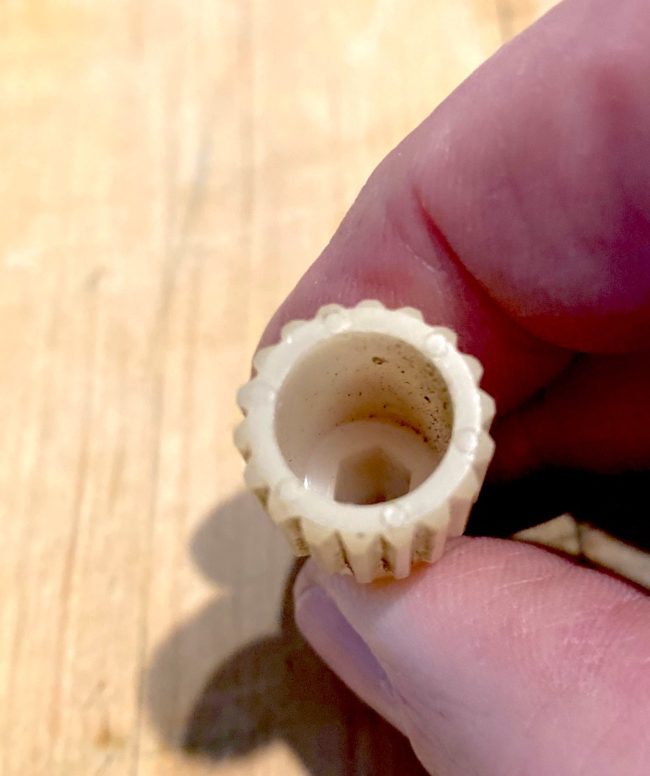
It is really common for these to break as they get brittle and easily snap when tightened.
Volvo updated them to an all metal knob.
If 1 side of your instrument cluster is loose, then you have the reason in hand.
If you need 1, I have both plastic and metal ones in stock.
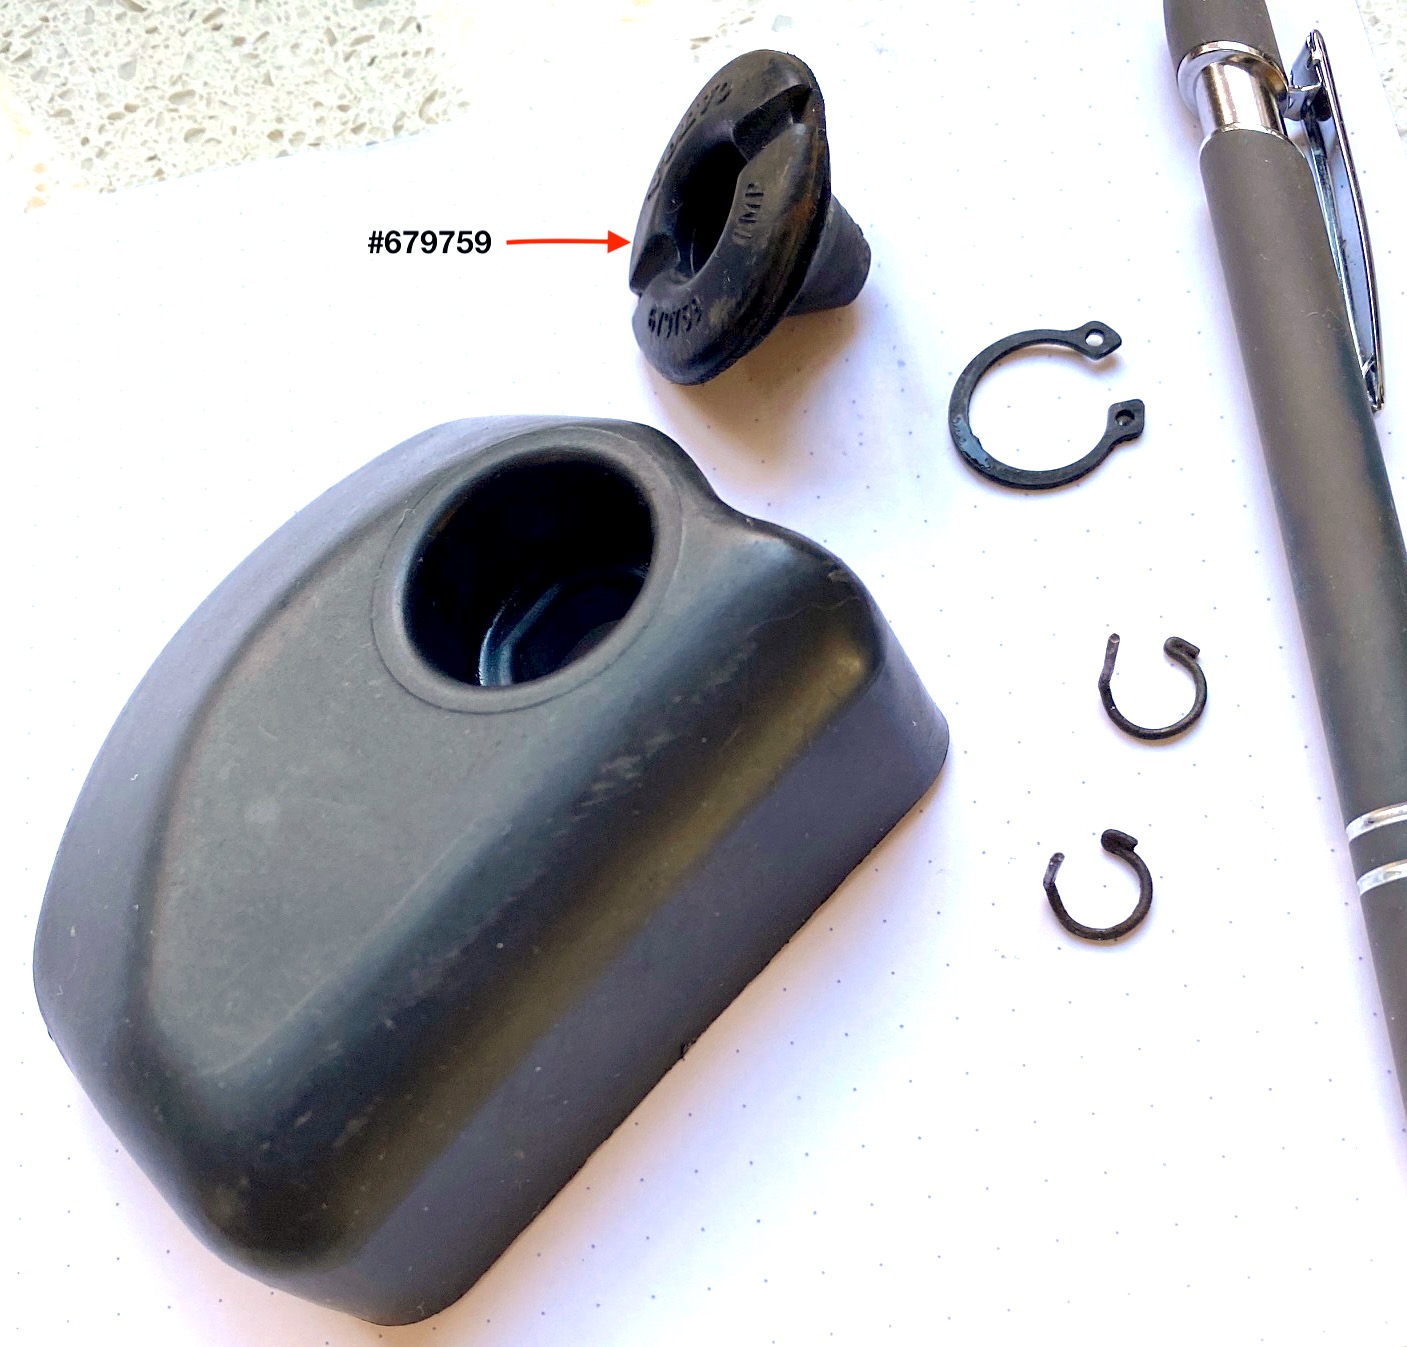
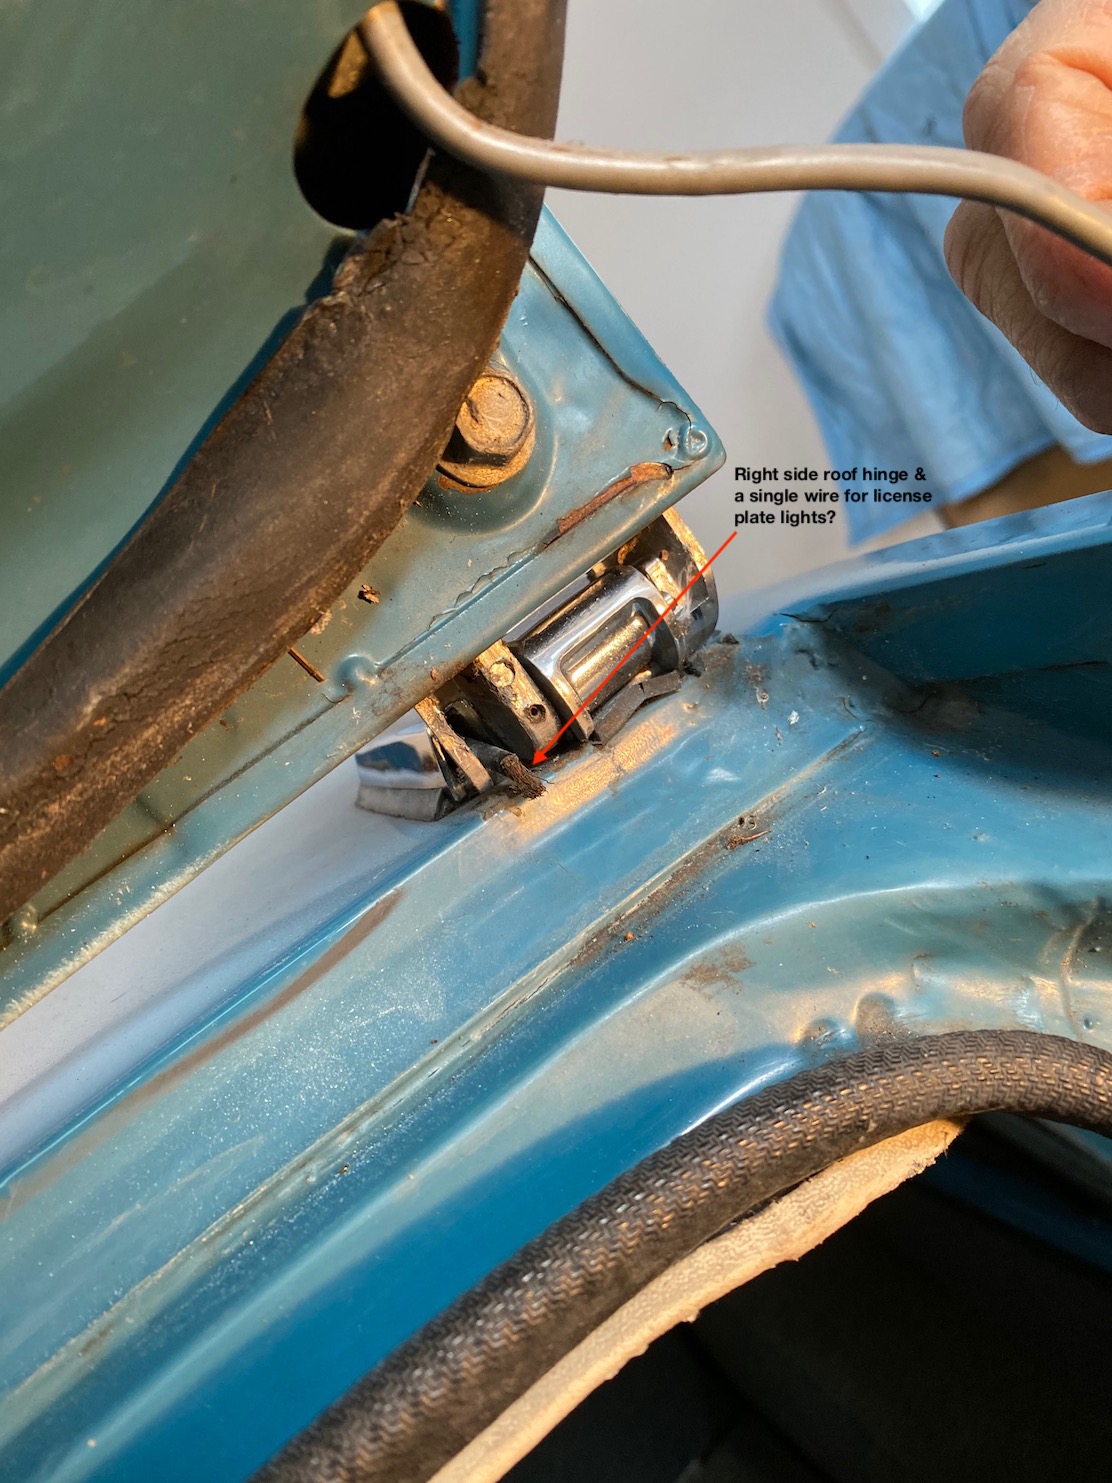
The rubber grommet is for the drain hole in the butt cheek (spare tire well).
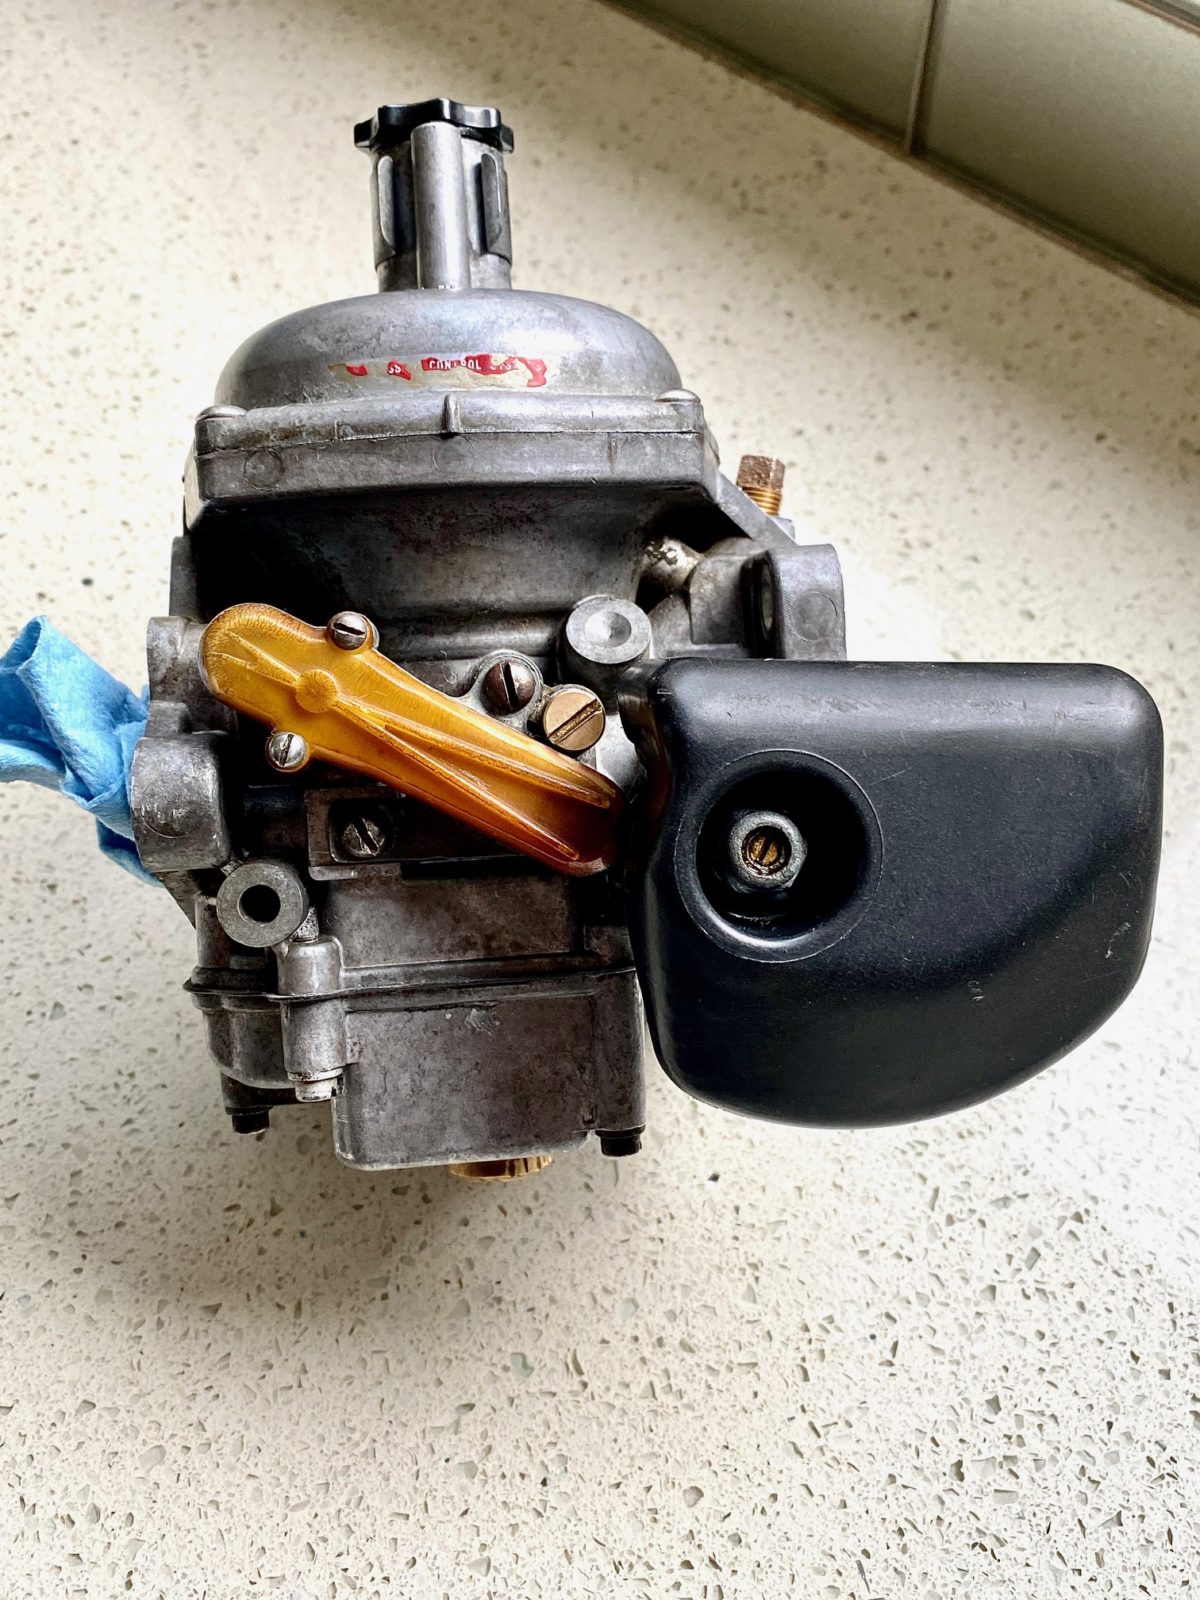
The wire locks are for the carb linkage.
I believe the plastic piece protects the front carb from snow and ice being blown into the linkage and causing it to jam.
I have no idea where the circlip came from.