• Hello Guest, welcome to the initial stages of our new platform!
    You can find some additional information about where we are in the process of migrating the board and setting up our new software here

    Thank you for being a part of our community!

HUB's 1968 122s Wagon Project

I don't have a pic of the front setup, but as I PM'd you I did not relocate my ball joints. Not even sure what the gain is there...

However, here is a pic I found of how I did the rear. Again, as I PM'd I don't know if the Combi versions have the same rear suspension setup but if they do:


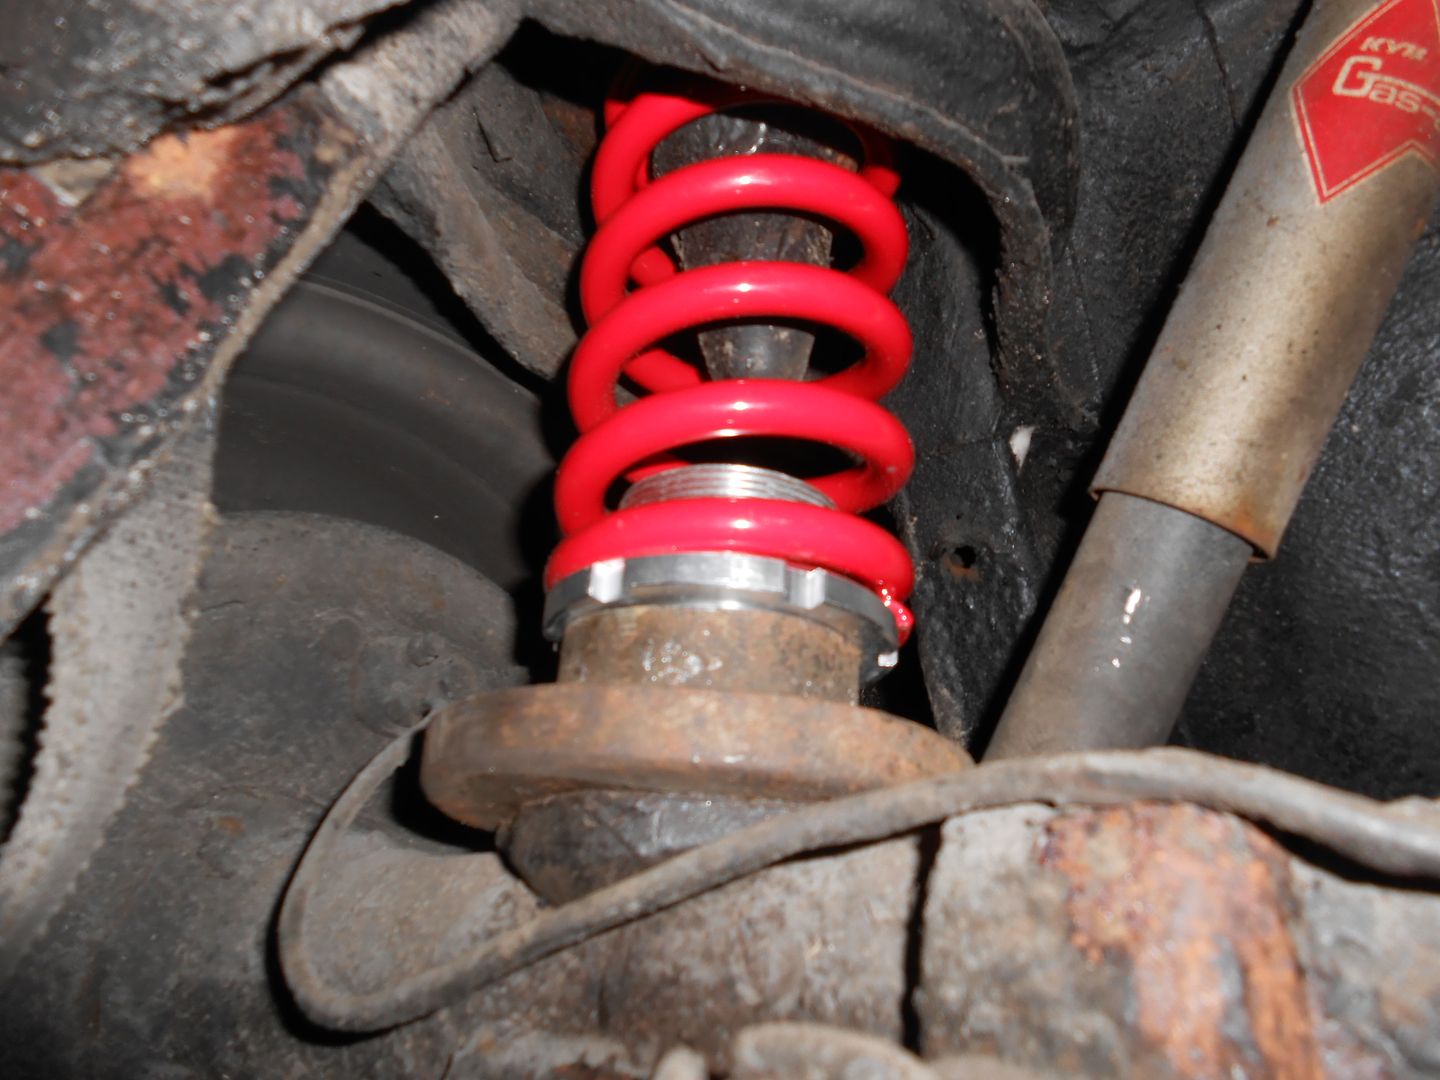
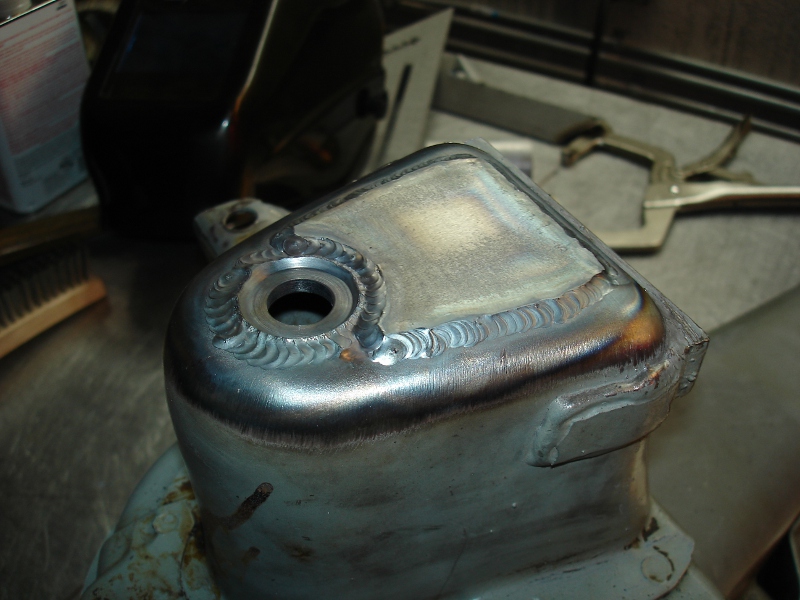
Here you see I cut off the top of the 'perch' the OEM spring sits on top. This is a direct fit for the Civic coilover sets. Note: I wanted to go lower so I removed the perch entirely, and now the spring sits directly on top of the rubber which is below the perch. This means the spring is no longer adjustable as a coilover, seeing as I removed the aluminum threaded pipe and locknut as well.
No picture of that I am sorry.

Subframe looks great btw.

ps obviously the above picture was taken before I shortened the top rubber which sits in the spring as thats far too long for these springs
 
Appreciate all the help! And thanks for the compliment. It's taken a while to prep and paint, but it's coming together.

I'll track someone down that has relocated the ball joint.
 
Reassembling of Front Suspension

Did some more cooking tonight.

CxGqElbl.jpg


S9gMEORl.jpg


The Bilstein shocks didn't come with poly bushings or grade 8 hardware. I did however find some from a previous project of mine. Should be able to make them work. :cool:

Thanks,
 
Last edited:
I like the ton of powder coating! reminds me that I need to find a couple ovens to make something big enough for the entire crossmember.

I love doing it. Makes a flippen mess though. Haha. Doing it myself was way cheaper. However, I'll have to take the bigger stuff to a professional. Can't fit it in my little toaster oven. Lol.
 
I know it's already painted, but while you have it apart you should reinforce the upper shock mount. It's notorious for flexing and cracking out, especially with harder shocks and poly bushings. Also notorious for being sharp and slicing up your bushings. On mine, I machined some thick metal bushings to seat the shocks better, then added a plate to double the thickness:

122_358.jpg


Just a suggestion.

Looks very sweet! Like it a lot. Front end isn't finalized, so I still may go back and do it.

Thanks,
 
I got the honda coil overs in last night. I'm really curious as to what people are doing for the front setup to keep the spring in place and seated evenly. Any help would be great appreciated. Thanks!

UPDATE: DON'T DO IT.
 
Last edited:
I spent a fortune on POR15 but I came to the verdict that it really sucks donkey nuts. Cleaned my (blasted and sanded) parts with the POR15 cleaner but still it came right off in big sheets just by peeling some off or by blowing air. A good epoxy primer is way better.
That's because it's a rust convertor, not paint. It needs rust to do it's thing and adhere. It's not designed to stick to a nice clean smooth surface.

I Appreciate it. However, this is why I bought a cheap gun for my first. So I can learn with it and won't feel bad. Once I got it, I may invest in something better.
The harbor freight type cheap guns are okay to do suspension parts, small items and the like, but even a cheaper Devilbiss (like cwdodson88 mentioned) will make your life a million times better. Wastes less paint with the better spray pattern, less likely to have painting flaws (runs/etc) as a beginner because the gun paints better (atomizing and spray pattern), and they are higher quality serviceable tools that you can keep a lifetime if you take good care of it.
 
Yeah. I emailed him a few days ago. Worst he can say is no again. Lol. Looks like I'll be going custom.
 
Yeah. I emailed him a few days ago. Worst he can say is no again. Lol. Looks like I'll be going custom.

The dynalite and superlite calipers fit our caliper mounts, the problem is rotors. There are a few people that have just put the dynalite calipers on stock rotors (this will be what I will most likely end up doing on the rear) but finding replacements are tough. you could remake the backing plate that attaches to the spindle and measure the offset and whip up a whole bracket. But in order to do this you will need to get calipers, and rotors. The reason that Dale did these was to be able to source an off the shelf rotor that didn't break the bank. My rotors can be replaced for 65.00 per pair, so that's a huge benefit.
 
The dynalite and superlite calipers fit our caliper mounts, the problem is rotors. There are a few people that have just put the dynalite calipers on stock rotors (this will be what I will most likely end up doing on the rear) but finding replacements are tough. you could remake the backing plate that attaches to the spindle and measure the offset and whip up a whole bracket. But in order to do this you will need to get calipers, and rotors. The reason that Dale did these was to be able to source an off the shelf rotor that didn't break the bank. My rotors can be replaced for 65.00 per pair, so that's a huge benefit.

Agreed. That's why I order one side through wilwood to see what worked. He PM'ed me back and said he would do something in about a month. Don't know if I can wait that long so will most likely get something custom made.

Thanks again for all your help!
 
Basically, I had thought about doing a whole plate that mounted to the spindle. It was going to be 1/4" steel plate with it being just about doubled up at the caliper (so there is more meat to tap)
 
Basically, I had thought about doing a whole plate that mounted to the spindle. It was going to be 1/4" steel plate with it being just about doubled up at the caliper (so there is more meat to tap)

That's a thought. I'll wait till the parts come in and can take a look at everything. That way I can make a better choice on what I want to do.

Thanks,
 
If i recal correctly, my front spring is kept in place by placing the aluminium sleeve with the lock nut halfway winded down on top of the spring.
The aluminium sleeve faals halfway into the spring, and the locknut sits on top of the spring. The locknut is then large enough to secure the top of the spring in the subframe

Would have to check for sure I did it this way when I get the car on a ramp.
 
Your fine. Didn't like how they sat. Ordered short springs rate for 700 (5x8). Will play with those next week.

Thanks,
 
Back
Top