SML
New member
- Joined
- Oct 20, 2017
- Location
- Pomona, CA
Excellent work !
Love it
Thanks!
Hello Guest, welcome to the initial stages of our new platform!
You can find some additional information about where we are in the process of migrating the board and setting up our new software here
Thank you for being a part of our community!
Excellent work !
Love it


This is cool!
i am doing a similar suspension swap, but on a 240
Cool. I'm following this Voldemort-Volvo. I like the fenders in that 2nd rendering you did with the Volvo schematic/diagram. No way I could do any of that work.


Looking good - not sure about the flair idea...can you find something that would fit with the style of the car a little better. How about a Dodge Omni fender or early A1 VW?
The flairs have to be about 4 inches straight out from the fenders, I don't know if I can get the little fender flares such as those to look anything but awkward. I'm planning on making them from scratch and using foam to shave out the plug for a composite finished piece. I have no idea how any of it will look, but I've seen guys do large versions of the flairs you've suggested and they look swollen and a bit too much for me.
Why not shrink the track a few inches and go that way?
That frame on B is for Build is scary. Cheap steel, no weld prep...I wouldn't drive that thing in anger - it will fight back. I'd rather not watch that guy build another car like this...millions would disagree.
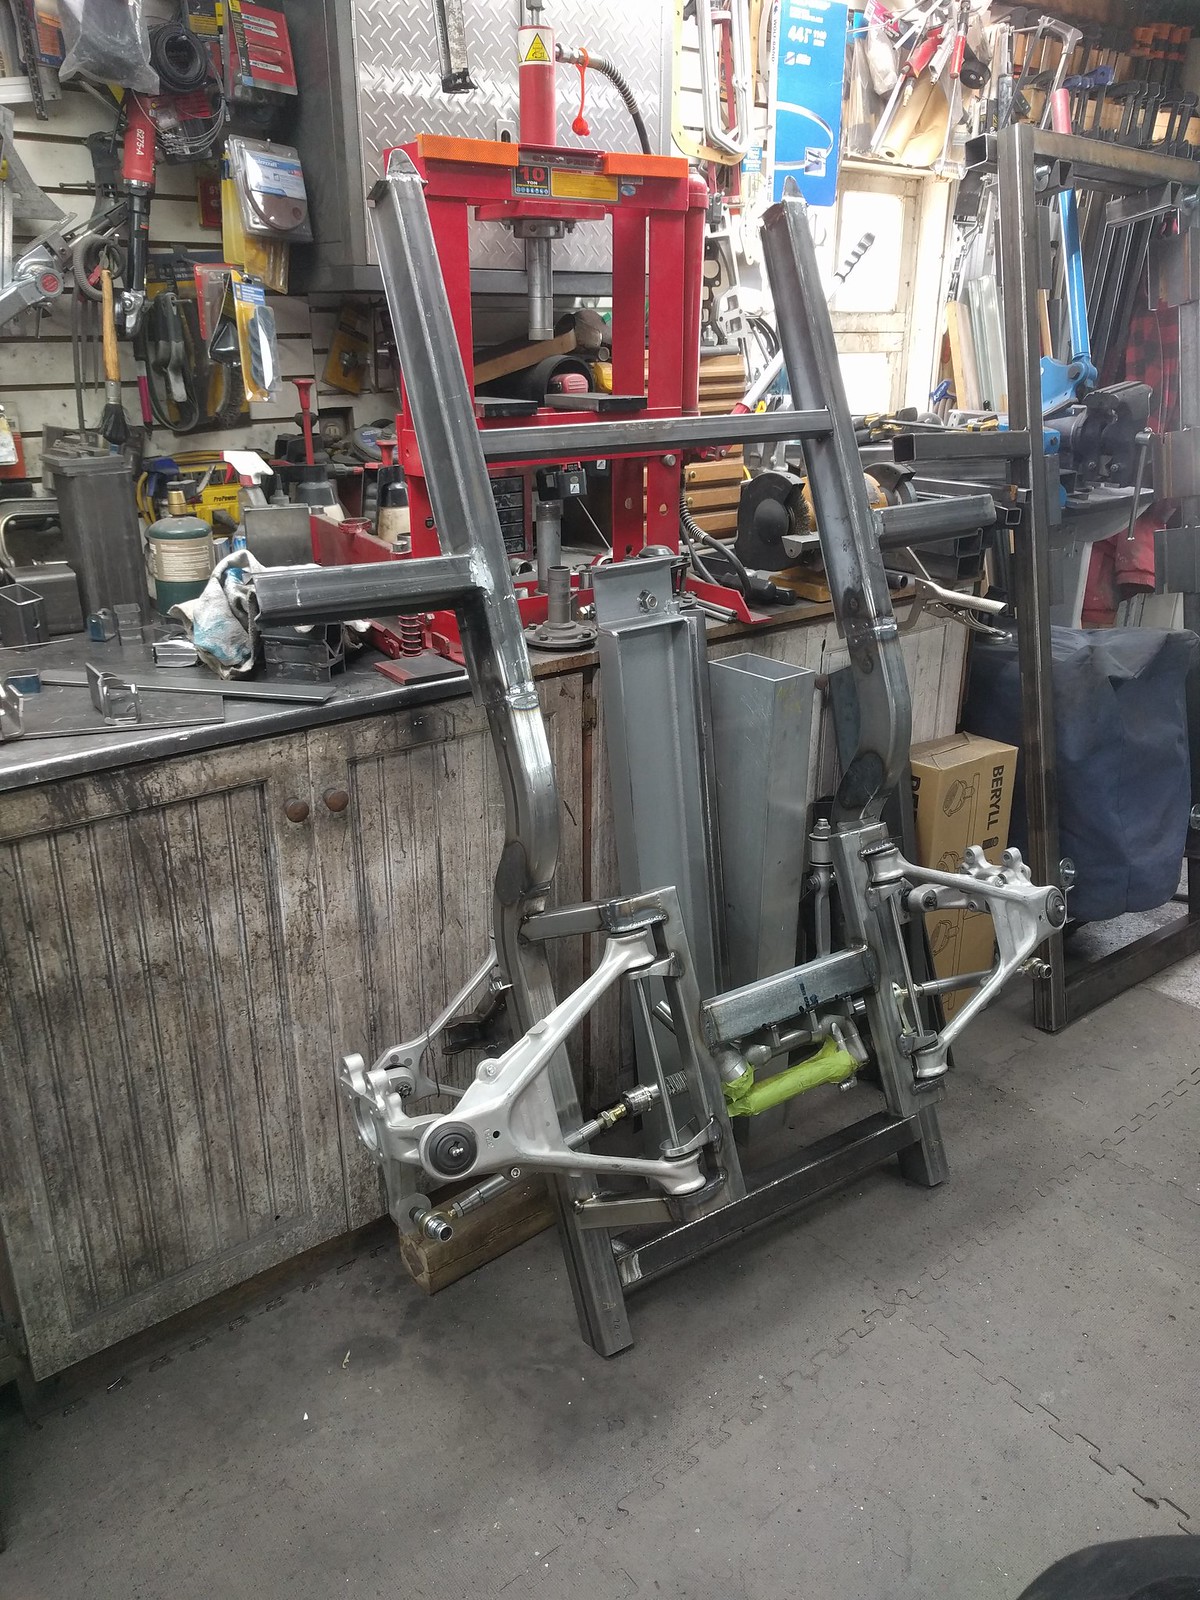
Can you get the half shafts in your press? They'll come out - service technicians do it with BFH and no regrets.