• Hello Guest, welcome to the initial stages of our new platform!
    You can find some additional information about where we are in the process of migrating the board and setting up our new software here

    Thank you for being a part of our community!

Our latest '70 145 Project - Need a few things. Any Ideas?

I get discouraged after time with this project but yesterday was a better day.

Don't get discouraged.
These cars are so simple.
It's amazing how often all it takes is removing, cleaning and reassembling to get something operable again.

If a dope like me can make an early 140 a dependable driver, anyone can.

:cheers:
 
Scored a good one!

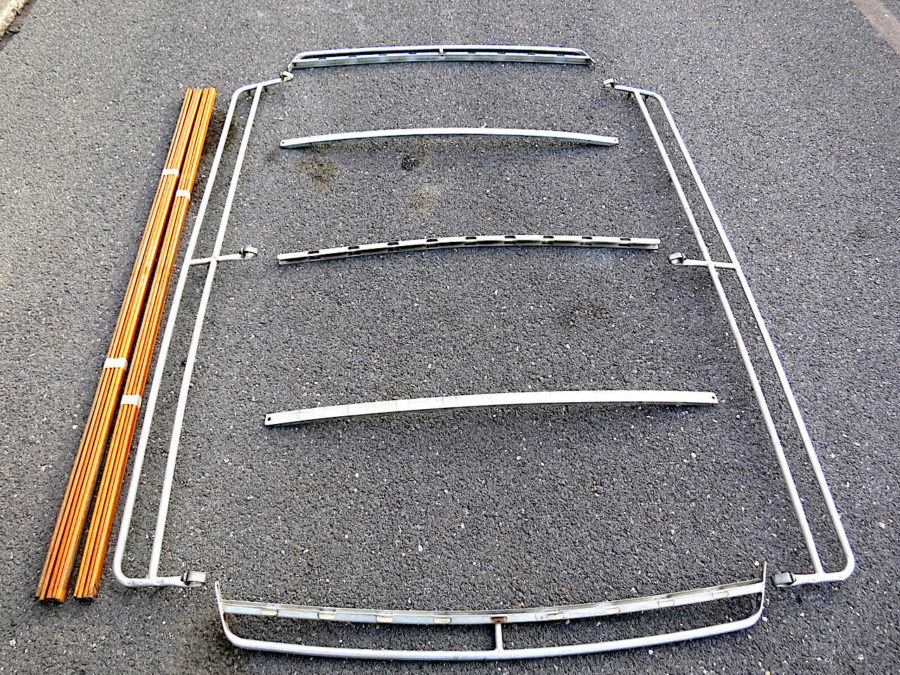
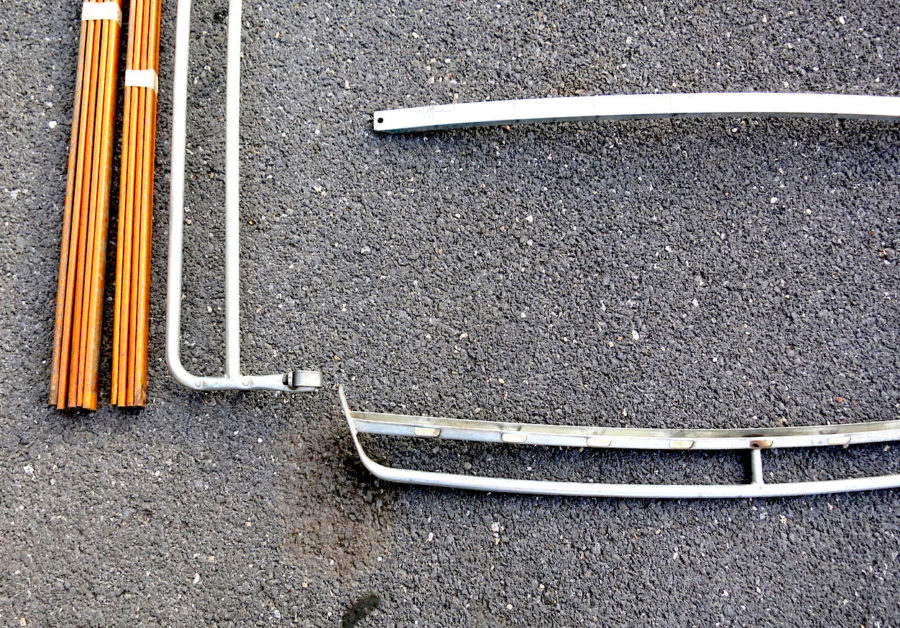
Look what I found! A really nice, original removable roof rack. I may have to refinish the wood slats but that is more of an opportunity than a pain.

I am still trying to sort out my turn signals and tail light issue. I installed a new LED compatible flasher, plugged in the lights and no results. I had the taillight housing unattached from the body and not one of the bulbs lit. I am a novice at lots of things like electricity so I'm thinking the light housings have to be attached to the body so they ground. Don't laugh if that is just stupid.

The wiring on this car is pristine so I am dumbfounded by this gremlin. I'll try putting the standard light bulbs in to see what happens. I'm going to get myself a test light.

unnamed-e1581458206396.jpg


unnamed-1-e1581458249352.jpg
 
I don't recall a separate ground wire for the light housings, so you would be correct that they need to be fastened to the chassis to complete the circuit.

I would recommend a VOA (voltage, ohms, amperage) meter instead of a plain test light.
They're much handier for troubleshooting electrical issues and they're inexpensive too.

Nice roof rack.
 
As noted, the body sheet metal forms the return path for just about all the lighting systems in the car. The light socket has to be plugged into the light housing and the housing has to be in good electrical contact with the rest of the body.

Have a look inside the light sockets. At the base of the socket you will see the contacts that are supposed to press against the contacts on the bottom of the bulb. After a few years of non use those contacts can develop an oxide coating that prevents current flow. Also, what is the inside of the socket like? It should be clean and shiny because that forms the contact for the return path through the chassis. Cleaning the inside of the socket with a Scotch pad made for scuffing paint will clean up the sockets and contacts nicely. At Home Depot and the like you can find a product called Ox Guard. Applying this to the socket and contacts (after they have been cleaned) can improve performance. Sometimes you will see that the contacts in the base of the socket are seriously worn down. If that is the case then replacement of the socket is in order.

I think you said you have the Green Book. If the problem persists have a look at the wiring diagram. Volvo symbols can be a little unintuitive; but, with a little study you should be able to figure out what is going on. Use a voltmeter to check for voltage on the turn signal and taillight circuits starting at the front of the car and working backwards to see if there is a place where the voltage 'disappears'.

Check all your fuses. If you have not done so already, I recommend that you replace them with new fuses. The end contacts on the 'torpedo' style fuses can disappear over time due to fretting resulting in flakey connections. Polish up the contacts with some of that Scotch pad and if the fuses are not a firm fit in the contacts bend the flexible contact just a smidge to ensure a tight fit. Some Ox Guard on the fuse contacts won't hurt.

Until you get things working, ditch the LEDs and LED flasher and use conventional bulbs for testing. LEDs draw very little current and can do quirky things if their load current is below the threshold current for reliable operation of a contact. If you get everything working with regular bulbs, then you can experiment with LEDs.

When I resurrected my '71 142E after 20 years of storage, I had a lot of trouble with the electrical system which ultimately I traced to flakey contacts in the light sockets and flakey grounds associated with a fresh repaint.
 
Very Appreciative!

What a great group of people all of you are to spend your time helping others out.. I?ve had lots of old cars in my life but I always paid someone to do the dirty work (renamed ?fun work?). I am thoroughly enjoying learning from you and consulting the Green Book. Thanks all for your patience and your time..
 
Turn Signal Switch

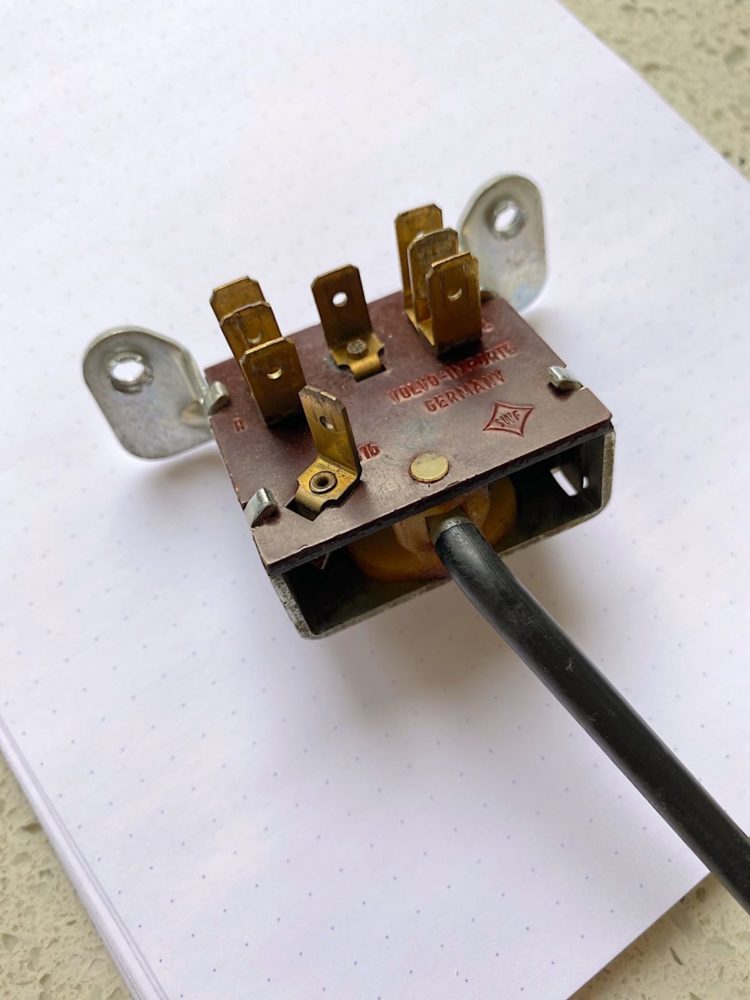
I know I mentioned it before and I hoped it wasn't the issue for my erratic light show. Alas, I think it is the problem. I brought it home today after running the lights with standard bulbs and a standard flasher.

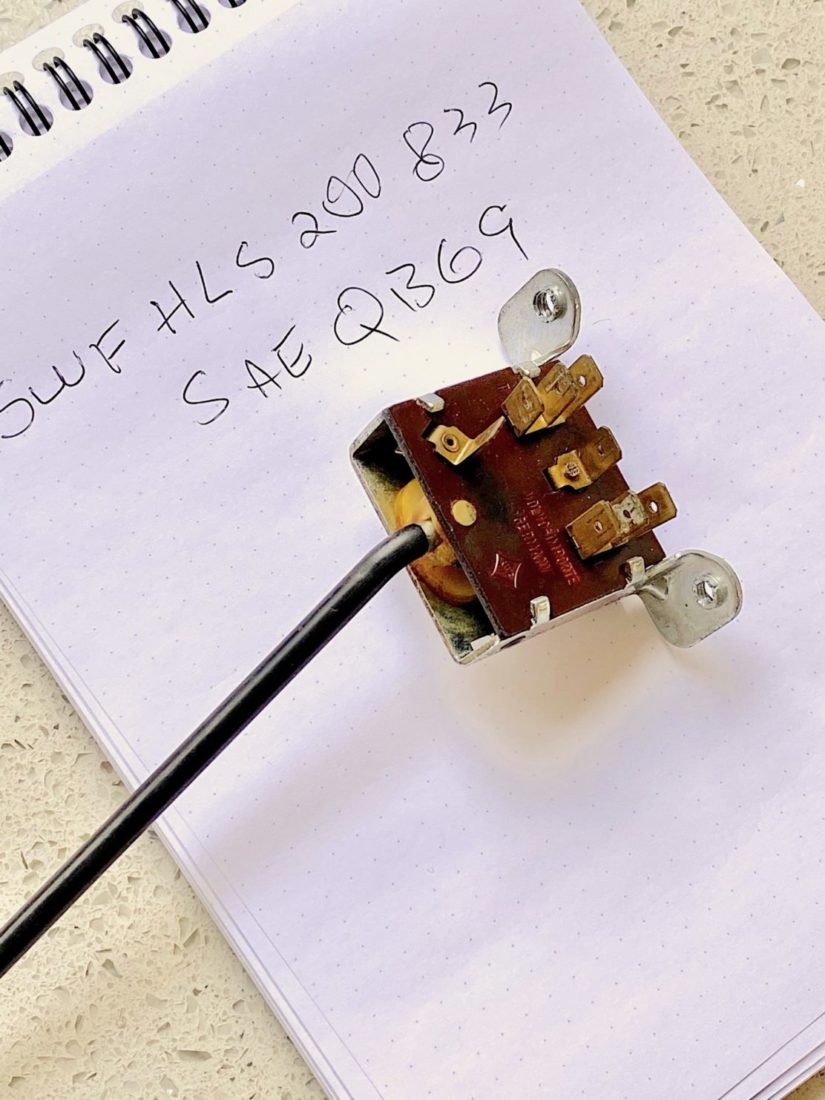
As soon as I connected the battery the headlights went on. If I fiddled with the switch, the directionals sort of worked. They flashed slowly for the left side and the right, both rear lights flashed. I think the switch is stuck on the high beam "flasher" and that is why they go on with the key. That must mean stuff is going on inside and these don't want to open easily for inspection. I will try to source a good used switch since VP says they are back-ordered with no plans for production.

So, if you know anyone who has one like mine, let me know. I'll post in "Wanted" and Facebook too.

Switch-2-e1581545801935.jpg


Switch-1-e1581545788978.jpg
 
Since you're looking to buy another anyways, why not just bend the tabs back and open the sucker up? Maybe there's some hope in fixing it once you're in there.

I agree and have taken those apart to clean and lube. There's nothing to lose.
Would hate to see it thrown away before any diagnosis.
 
I need a little help with Hazard Lights/Directionals

I have the correct bulbs in place with squeaky clean contacts. My hazard light switch was not working so I obtained a used one from Don Theibault. I swapped the wires exactly how they were installed on the original switch.

The lights illuminate but no flash for directionals or hazards. The little red light on the knob illuminates and I have a brand new LED compatible relay.

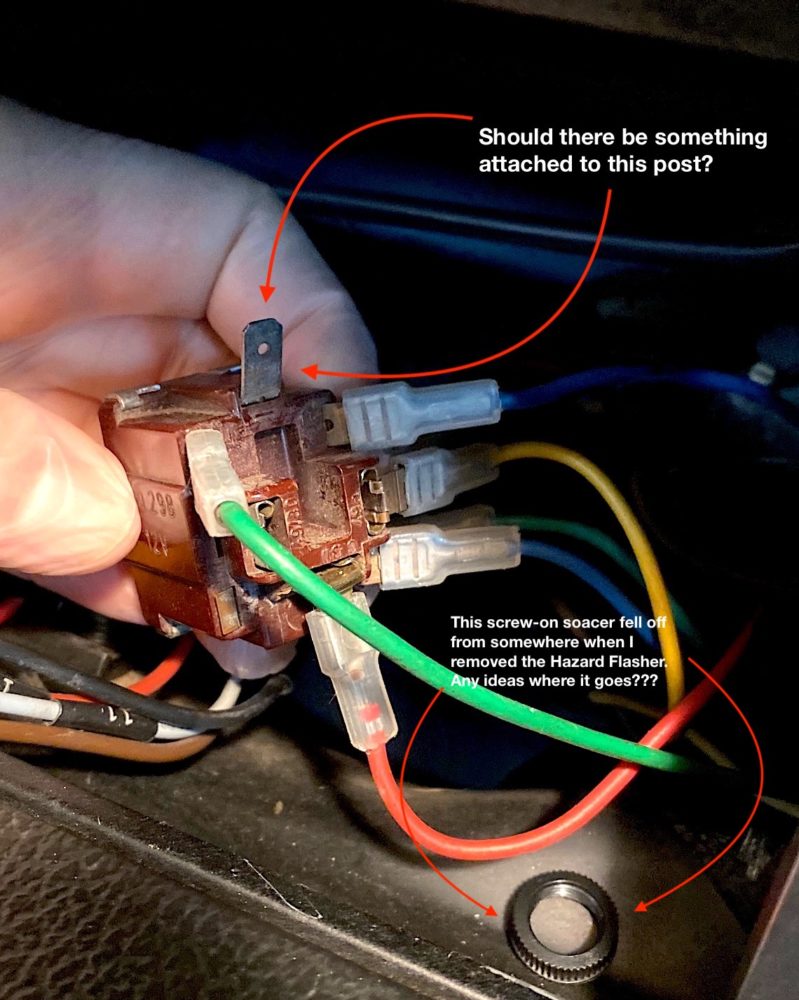
My question to you who knows all is: Is there some wire that should attach to this empty pole? I don't see anything lose under the dash...maybe I didn't look hard enough?

One last thing...there is a black plastic screw-on spacer that fell out from somewhere when I removed the flasher switch. Any ideas where it should go??

Flasher-switch-1-e1582662316860.jpg
 
Last edited:
Congratulations to the rack

If I see correct there is a - (minus) at this port.
In the middle I see 30, 49, 49a

This hazard switch is with the relay at the backside
The minus - is earth/body ( 31)

Good luck, Kay
 
Post the numbers at the switch
The colour of the wires you add and where they go to
There are a lot of different switches available

I don't know who Don Theibault is, no clue
 
Post the numbers at the switch
The colour of the wires you add and where they go to
There are a lot of different switches available

I don't know who Don Theibault is, no clue

He sells parts for 1800s primarily at P1800.com. He found me a New Old Stock rearview mirror for the 145.

The switch I bought from him has the same part number as the original switch.
 
Does the lights flash with the old style relay?

As for the plastic spacer. It looks like a retaining nut for an aftermarket switch.

How is your hazard switch mounted? There's supposed to be a chrome plated plastic washer that's designed to break away in an accident holding the switch into the dash. When it breaks most people just rig something to hold the switch to the dash and that may be why the spacer was there.
 
The wiring diagram has 6 wires connecting to the hazard switch

Green - pin 30 (goes to fuse panel)
Blue /Yel - pin 15 (goes to fuse panel)
Yellow - pin 48a
Green- pin L (goes to signal light switch)
Blue - Pin R (goes to signal light switch)
Red - Pin C (C is the center connector for the 3 pin flasher so it looks like you have that correct) - the red wire just goes to the dash turn signal indicator light so is not critical to operation.


Make sure you did not mix the two green wires; but, based upon your description of operation I think you have it correct.

If you flick your turn signal lever to left and right and the external indicator lights illuminate; but, do not flash I think your wiring is correct and the problem is your flasher module. Be aware that the pin assignment for the flasher module on early cars is not the same as the pin assignment on modern cars. Just because it fits does not mean it will work. My recollection was that without some additional rewiring, there were no LED compatible flashers that would work on vintage Volvos. If you want to use LEDs for signal lights you need to use load resistors.

Ditch the LED flasher module for an older style flasher. Try the Tridon EL13 or EP 13 or HD13. None of these flashers are LED compatible (the HD13 may not hyper-flash with LEDs - but may not flash at all)
 
I have the correct bulbs in place with squeaky clean contacts. I swapped the wires exactly how they were installed on the original switch.

The lights illuminate but no flash for directionals or hazards. The little red light on the knob illuminates and I have a brand new LED compatible relay.

My question to you who knows all is: Is there some wire that should attach to this empty pole? I don't see anything lose under the dash...maybe I didn't look hard enough?

I have an old (1970) switch that has the wires still attached and they are in the same locations that your photo shows. Unfortunately / fortunately (?), it does not have a wire attached to the male post either. Can't get under the dash of my '70 right now to see how that one is wired (it works).

For now, I would use a standard flasher instead of the LED flasher while you are troubleshooting this problem.
My suspicion is that the resistance that OE flasher was designed for is significantly different than a LED flasher.
Hence the LED flasher will not work with standard (factory style) bulbs.
 
Back
Top